SQL Server for Beginners Part 3 - Installing On-Premises Gateway
In the third part of this series, we'll look at how to connect PowerApps with a local instance of SQL Server. The tool that carries this out is called the on-premises gateway and in this post, we'll walkthrough the installation and setup process.
The first step is to download the On-premises gateway through the following page on the website. The installation EXE is about 150MB in size.
We can install the gateway on any machine on our local network. For production use, Microsost recommends installing the gateway on a machine with a fast internet connection that's always powered on. In this post, we'll be installing the gateway for development/test purposes so to simplify this task, we'll install the gateway on the same computer that we installed SQL Express. The reason why this is simplifies the task is because if we were to install the gateway on a different machine to SQL Server, we would need to configure the Windows firewall on the SQL Server machine to allow SQL Server traffic, and in the case of a named instanace, to enable the SQL Server Browser service.
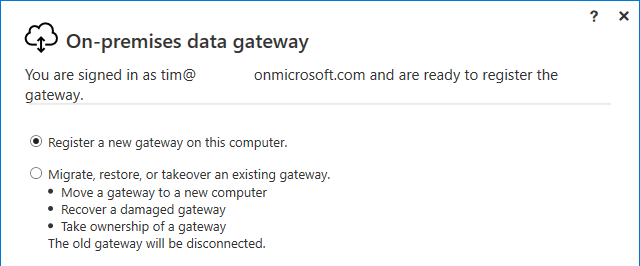
The first step to install the gateway is to run the GatewayInstaller.exe file that we downloaded. The first pages in the installer prompt us to select an installation path and to accept the license terms and conditions. Next, the installer prompts us to login with our Microsoft Work Account. After logging in, we can choose the option to register a new gateway on our computer.
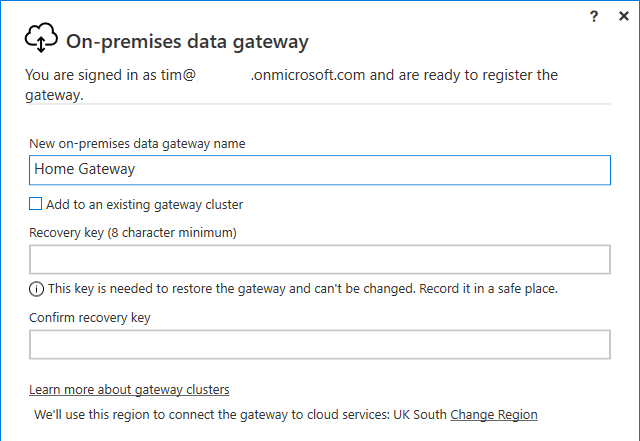
The next step prompts us to enter a data gateway name. It's possible to install multiple gateways on multiple local networks. In this example, I'm installing the gateway on my home network and I'm calling the gateway Home Gateway.
We need to set a recovery key in case we need to reinstall the gateway on a different machine and therefore, It's important to make a note of what this is.
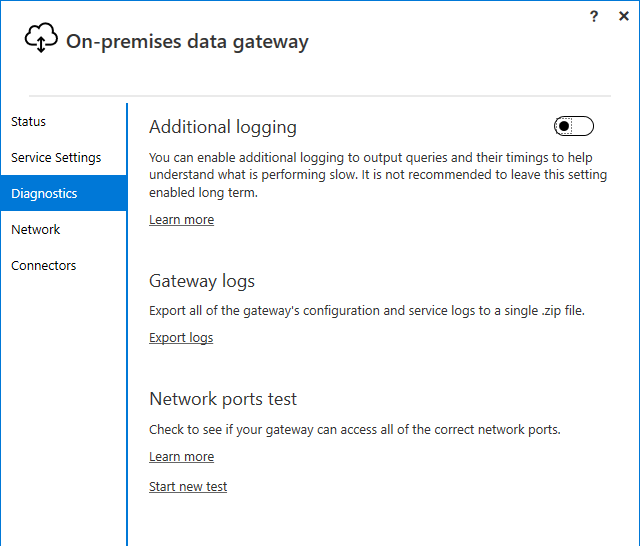
This completes the installation of the gateway. On the final page, we can configure logging and also carry out network ports test, which is very helpful for diagnostic purposes.
Connecting to SQL Server from PowerApps
Now that we've completed the installation of the gateway, we can connect to our database from PowerApps.
Through the View > Datasources menu, we can choose the SQL Server connector and add a new connection.
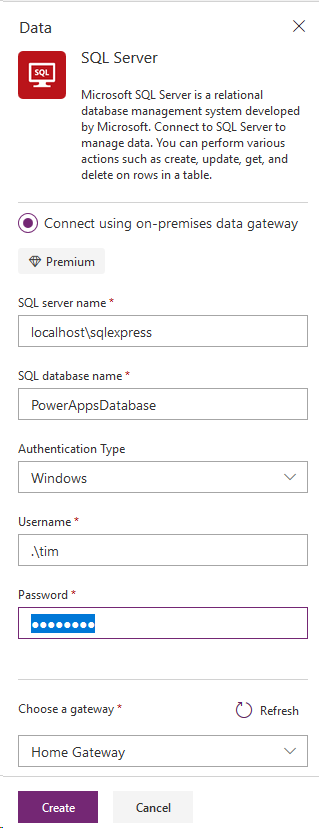
Here are some notes on the settings that are shown above:
- SQL server name - Because we installed the gateway on the same computer as the SQL Server, we can use localhost as the server name (ie the SQL Server name is relative to the path on which the gateway installed). As we're connecting to a named instance of SQLExpress, the instance name is included here.
- SQL database name - This is a free text input control, so it's important to enter your database name correctly here
- Authentication type - We can choose Windows or SQL Authentication here. Because it can sometimes be difficult to get all the server and login credentials correct on this page, connecting to a server with mixed mode authentication is useful because it provides us with a second type of authentication for diagnostic purposes.
- Username - I'm using Windows authention and my username is tim. Therefore, I can enter my username in the format .\tim
Once we create our connection, we can choose our views/tables in the next page and we can then connect to this data from within our app.
Summary
In this post, we've walked through a basic install of the on-premises gateway. With the on-premises gateway installed, we can connect to SQL Server Databases that are installed on our local networks.
