Data - A walkthrough of how to migrate the data source of an app from Excel to Sharepoint
There are occasions where it's necessary toto migrate the data source of an app. A typical example is where an app builder builds an app that's based on an Excel data source. When the amount of data that app stores exceeds 2,000 records or 2MB, a need arises to migrate to a more capable data source. SharePoint is often the most natural choice, as it requires no additional licensing for Microsoft 365 users.
To demonstrate the data migration process, this post walks through the steps to modify the sample Service Desk app to use a SharePoint data source, rather than the default Excel data source.
Step 1 - Prepare the app and migrate the data

Step 2 - Delete the Excel tables from the app
Step 3 - Add the replacement SharePoint lists
Step 4 - Resolve the errors using the App Checker tool
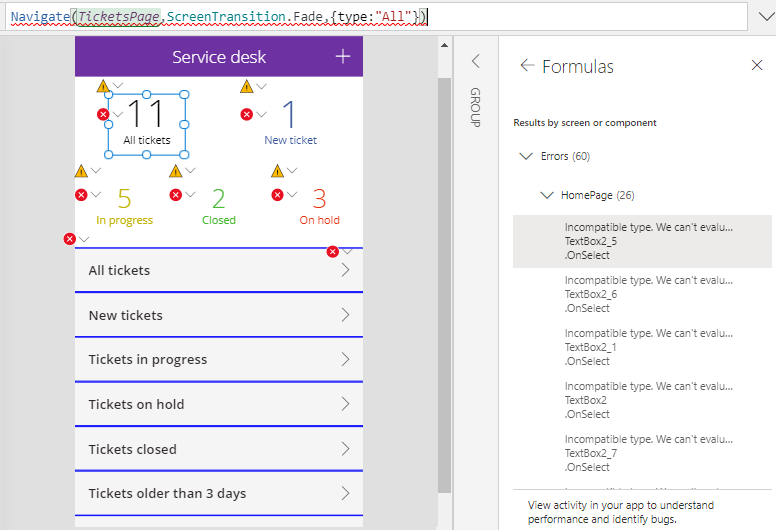
After we add the SharePoint tables, we can fix any errors by working through the App Checker list. The screenshot beneath shows that there are 60 errors.
To demonstrate the data migration process, this post walks through the steps to modify the sample Service Desk app to use a SharePoint data source, rather than the default Excel data source.
Steps to migrate a data source
To change the data source for an app, there are 4 primary steps. These are:
- Migrate the data from Excel to SharePoint
- In Power Apps, delete the existing data sources from Data panel
- Add the SharePoint datasource
- Fix any errors that arise
We'll now go through these steps in more detail.
Step 1 - Prepare the app and migrate the data
This example uses the sample Service desk app. Because this is a built in template app, the first step is to unlock the data panel, as described in my post here.
http://powerappsguide.com/blog/post/code-manifest-file-unhide-data-panel
http://powerappsguide.com/blog/post/code-manifest-file-unhide-data-panel
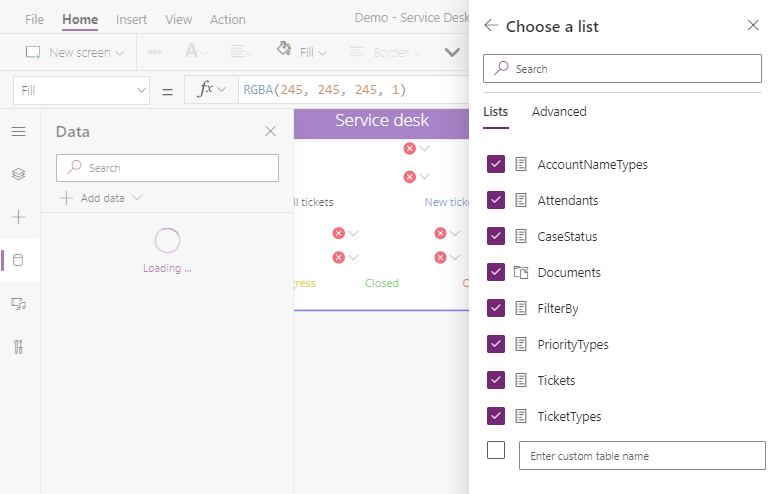
This reveals the tables in the app, as shown in the screenshot beneath.
The next step is to create the 7 SharePoint lists that will replace the orginal 7 Excel tables. The easiest way to do this is to import the source Excel tables from SharePoint, as I describe here
To make this process as simple as possible, we should name the replacement SharePoint lists with names that are exactly identical to the Excel tables. This will minimise the need to apply additional modifications to formulas that reference the source data.
Step 2 - Delete the Excel tables from the app
Once we import our Excel data into SharePoint, we can delete the Excel tables from the app. The screenshot beneath shows the appearance of the app after we delete all the tables.

Step 3 - Add the replacement SharePoint lists
Next, we click the 'Add data' button to add the replacement SharePoint lists..
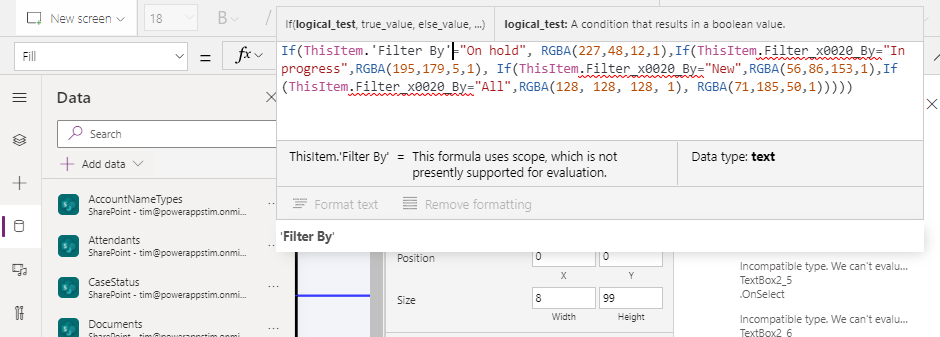
Step 4 - Resolve the errors using the App Checker tool
After we add the SharePoint tables, we can fix any errors by working through the App Checker list. The screenshot beneath shows that there are 60 errors.Many of these relate to invalid formula references because I named the replacement SharePoint list 'FilterBy', instead 'Filterby'. This difference in casing invalidates the existing formula in many places, and I recreating the SharePoint list with the name 'Filterby' to correct the errors . This provides a good reminder to make sure to create SharePoint lists with names that match the exact case of the source Excel tables.
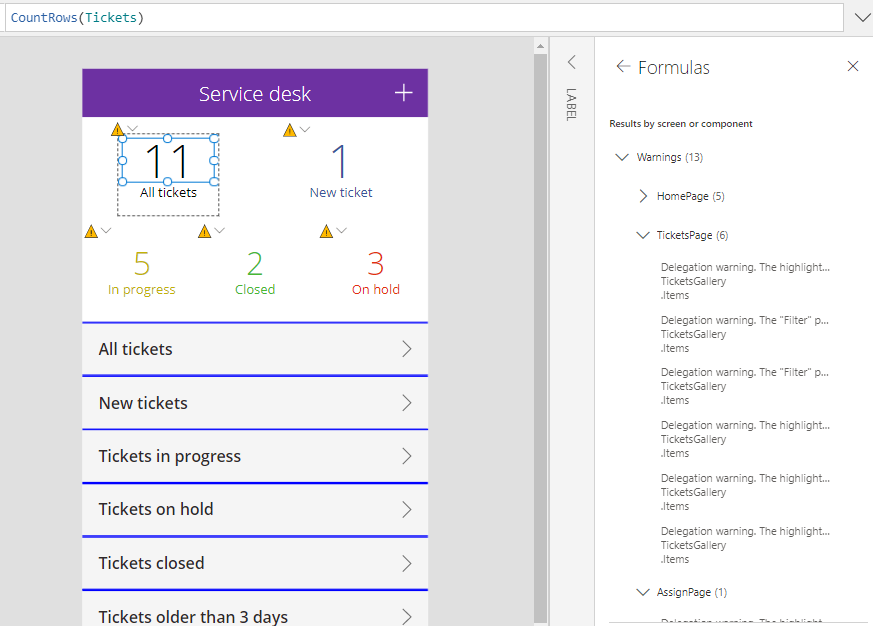
The next set of errors in the App Checker list relate to 'incompatible type' failures when setting the variable 'type' on the HomePage. To resolve these errors, we can use the Variables section of the designer and review all the places that set this variable.
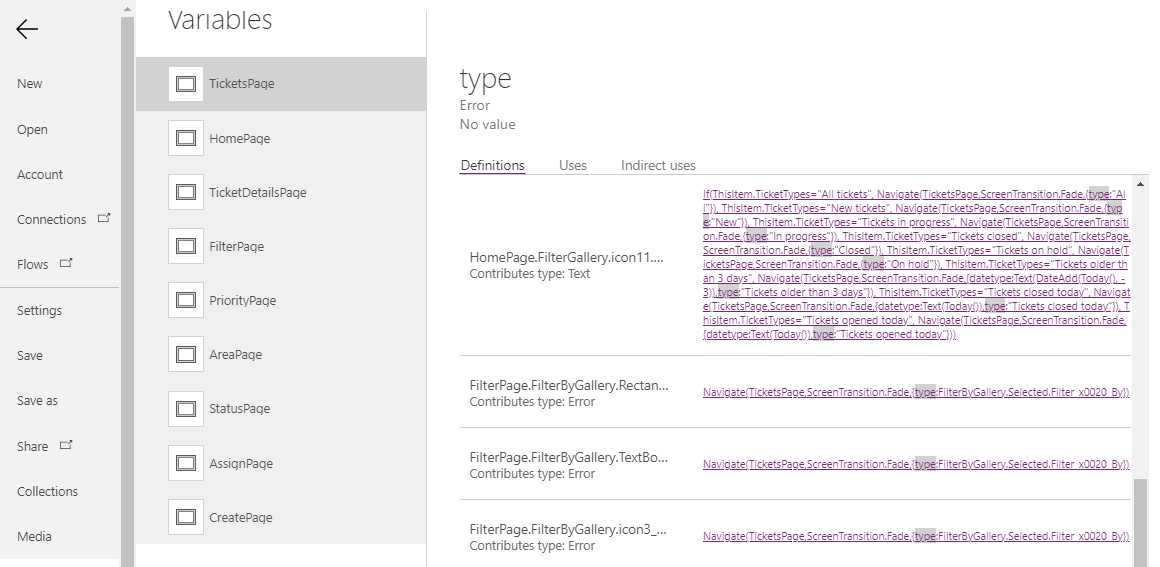
We discover that many of these errors are caused by a difference in field names. The orginal formula referred to the 'Filter By' field as 'Filter_x0020_By'. The '_x0020_' identifier is what we use with Excel to specify a space in the field name. With SharePoint, we can use the friendlier idenfier 'Filter By' instead, and repacing all instances of 'Filter_x0020_By' with 'Filter By' fixes the remaining issues.
Final Step - Test the app
At this point, the only remaining issues in the app checker are delegation warnings, which we can resolve at a later time. We can now test our app, and confirm that it works as expected.