SQL Server for Beginners Part 1 - Installing SQL Server
SQL Server is the best data source for PowerApps. If you want to use an on-premise SQL Server but don't know where to start, this post is for you. In this series of posts, we'll walk through:
- How to install SQL Server (the database engine).
- How to install Management Studio (the tool for creating and managing databases).
- How to install the on-premises gateway, and how to connect a PowerApp to your database.
Downloading and Choosing an Edition
The first step is to download SQL Server from here:
There are 2 free editions you can choose: Developer or SQL Express. The difference between the two are:
-
SQL Server Developer Edition - This is a fully featured free edition for development or training purposes. The main limitation is that the license does not permit the use of the database in production.
-
SQL Server Express edition - This is free and CAN be used in
production. However, it has various limitations including a storage limit of 10 GB, and memory limit of 1GB.
For the purpose of this post, we'll choose the Express edition.
Downloading and Choosing an Edition
Once you've downloaded the installer, you can run the setup. The steps are mostly intuitive, so I'll highlight the main ones.
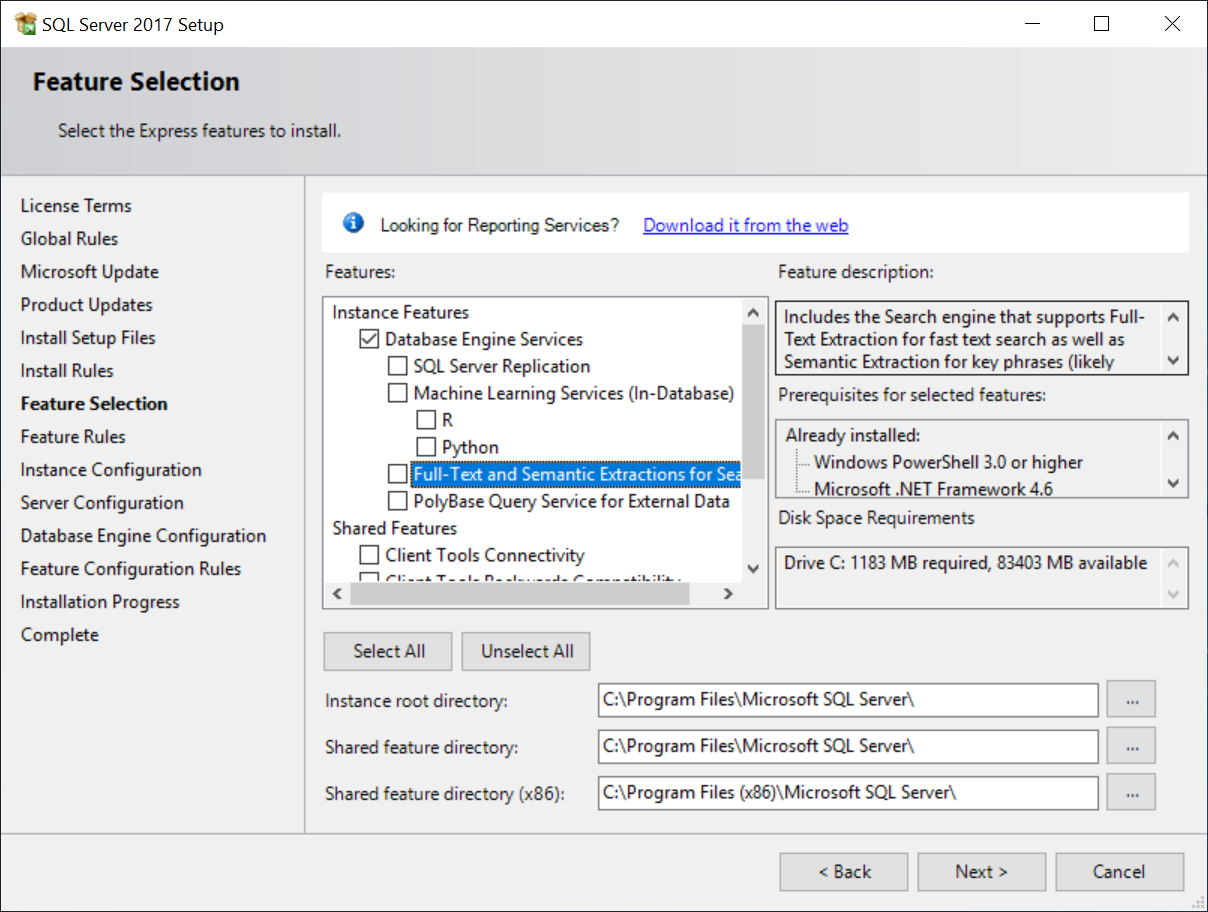
In the feature selection dialog, 'Database Engine Services' is the only feature that you need to select for a working installation.
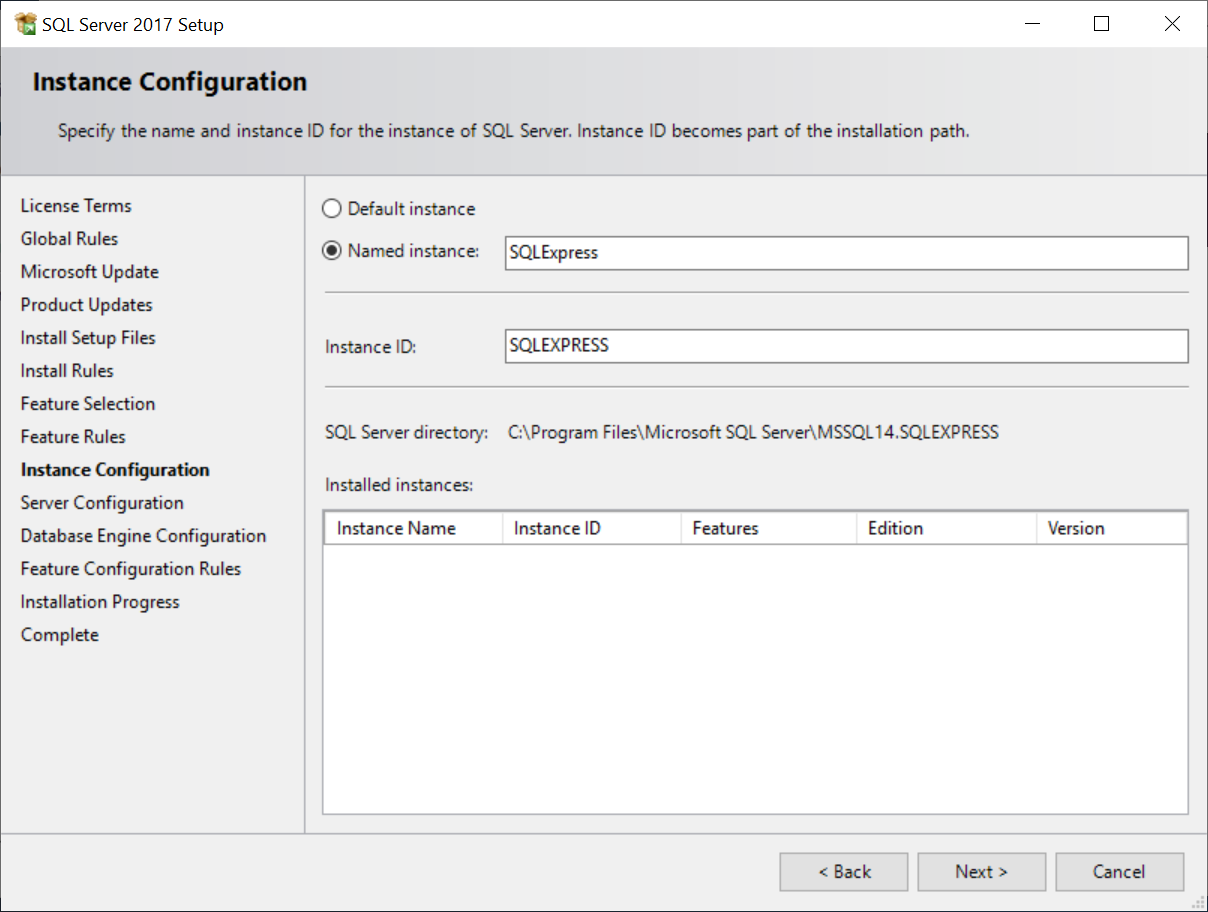
In the 'Instance Configuration' dialog, I recommend that you keep the named instance of 'SQLExpress'. Naming an instance enables us to install multiple versions/editions of SQL Server on a single machine (eg SQL Express/SQL 2012/SQL 2016).
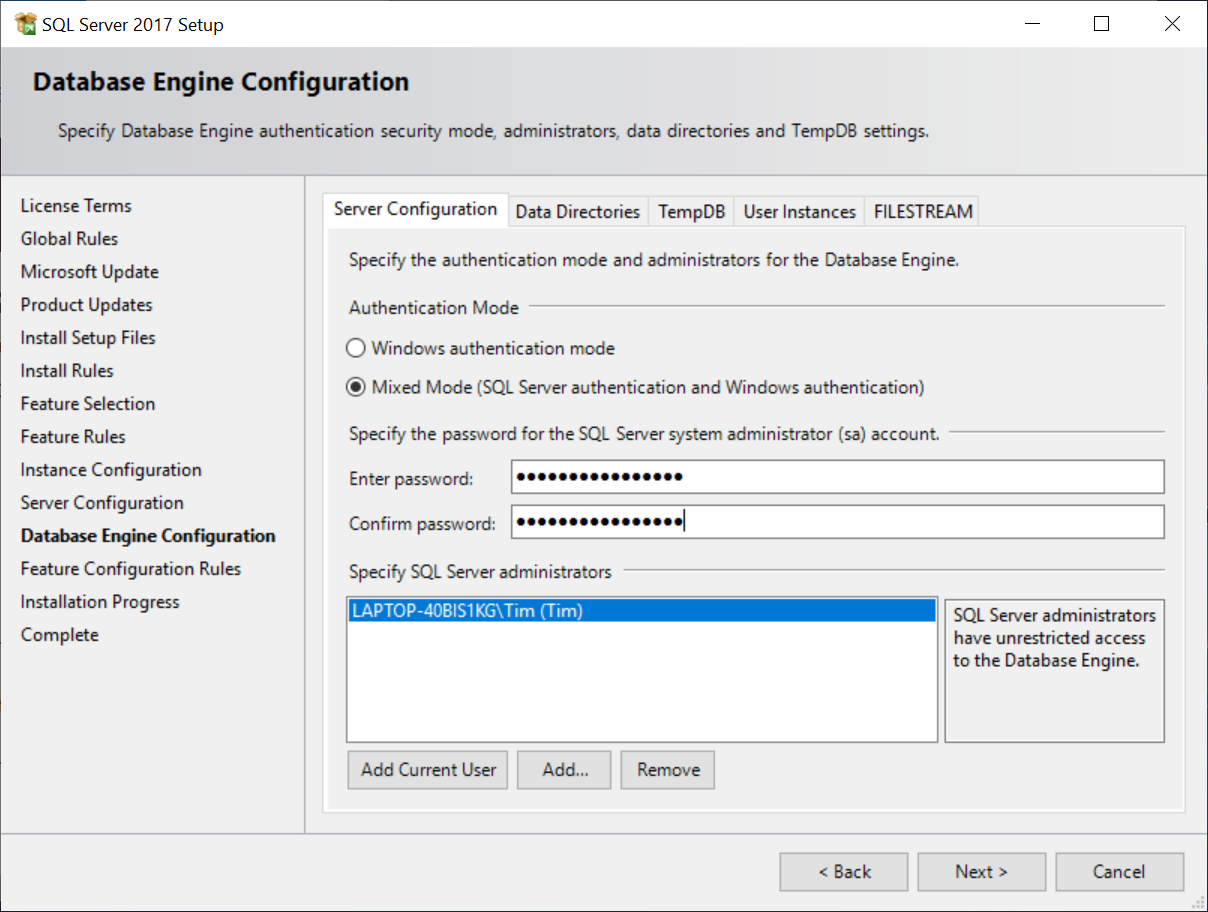
With SQL Server, there are two authentication options: Windows
authentication and Mixed Mode. Windows
authentication uses the Windows Account to authenticate to SQL.
Mixed Mode provides the option to create logins and passwords within SQL
Server. I highly recommend Mixed Mode because it provides us with an additional authentication option, should the on-premises gateway fail to connect (we'll cover this in the next post).
We can accept the default options for the remaining dialogs and at the end of this process, you'll have a working instance of SQL Server.
Final Steps
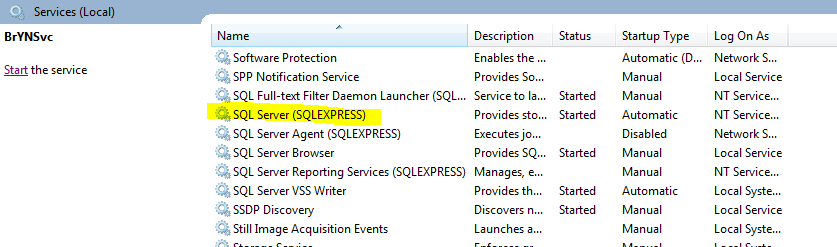
SQL Server runs as a Windows Service and you can manage it through the Administrative Tools > 'Services' part of Windows. If SQL Server doesn't appear to work, here is the first place you should check.
The next step is to setup a database and to create tables in your database. To do this, you'll need to install SQL Server Management Studio and we'll look at how to do this in the next post.
