SQL Server for Beginners Part 2 - Installing Management Studio
In this next post on setting up an on-premise SQL Server for use with PowerApps, we'll walk through how to install SQL Server Management Studio. This is the tool that we use to create databases and tables.
The first step is to download SQL Server Management Studio and you can do this through the link below.
Once you download the installer, running the setup process is a very simple process. There are no options that you need to configure.
At the end of the process, the installer will create a shortcut to SQL Server Management Studio in your Start Menu.
Here is the screen that we see when we first start Management Studio. In our example, we installed a named instance of SQL Server called SQL Express. So in the 'Server name' textbox, we can type in 'localhost\SQLEXPRESS'.
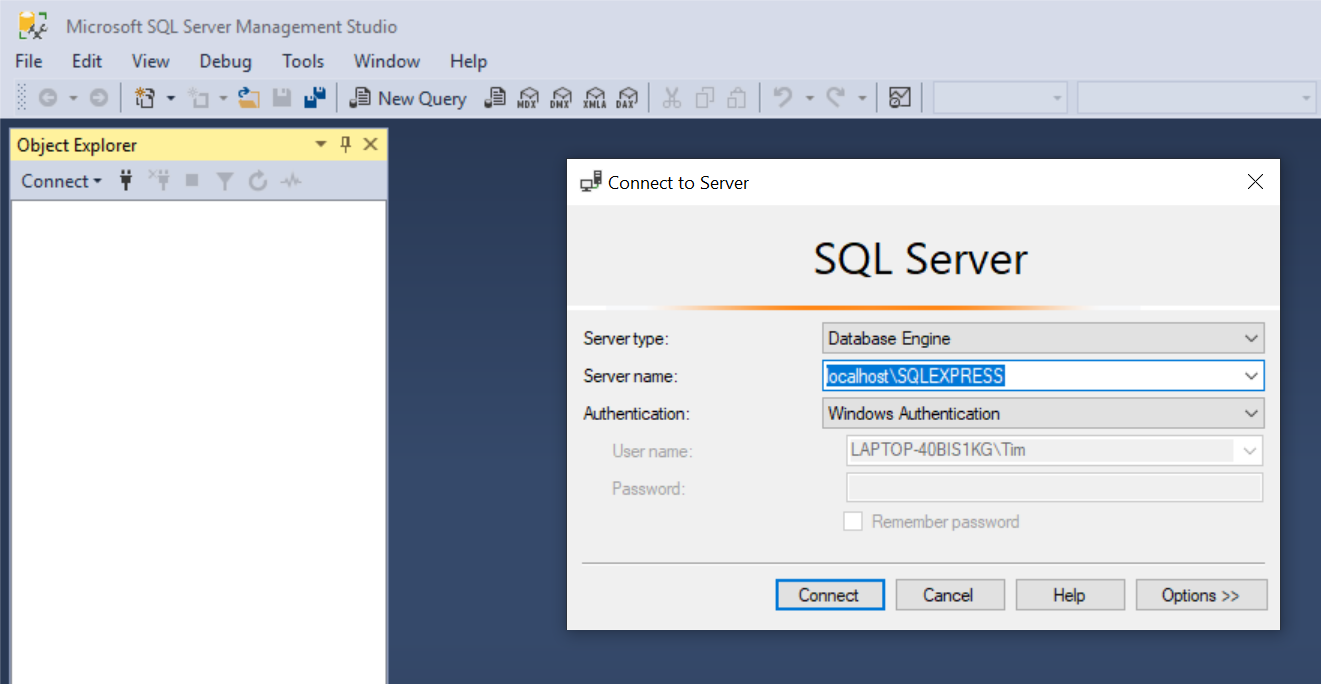
When Management Studio opens, the SQL Server Instance will appear in the 'Object Explorer' section on the left hand pane.
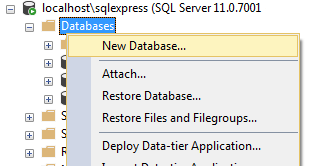
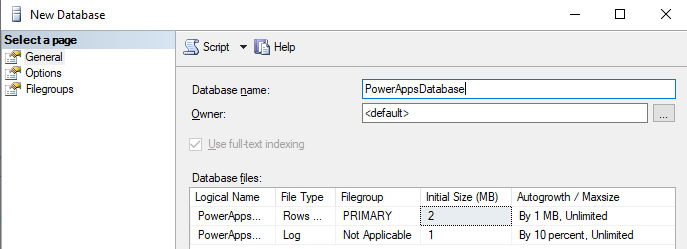
To create a database, right click the New Database option. In the 'New Database' window that appears, the most important step is to provide a Database Name. We can retain the default values for the other settings.
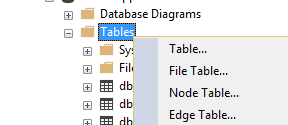
Once we've created our database, we can create a new table by right clicking the Tables node and selecting Table.
This opens the table designer and from here, we can define the fields fields that we want to store in our table. As an example, here's the definition of a table that stores employee records.
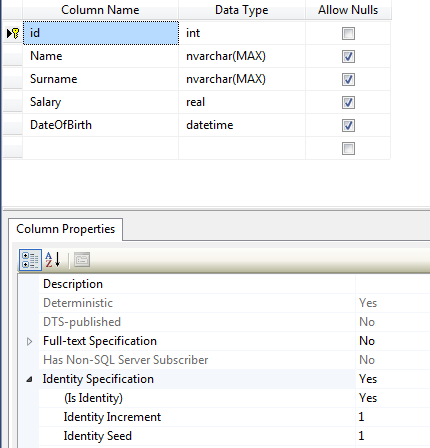
The VERY important thing to note is this. In order to edit records through PowerApps, the table MUST have a primary key. Here's an example of a typical problem that occurs when no primary key exists on a table.
In the screenshot above, the id column is the primary key. We can define this by right clicking the 'id' row, and selecting the 'Set Primary Key' option. In this example, the id column is also defined as an Identity column (as shown in the screenshot). An identity column defines an auto-incrementing numeric column, and this is the setting that I recommend for a primary key.
Summary
In this post, we walked through how to setup a database and how to create a table. In the next post, we'll look at how to setup the on-premises gateway. This is the tool that enables us to connect to our database from PowerApps.
