Gallery Control - How to Paginate Data
If you need to need to add paging functionality to a gallery control,
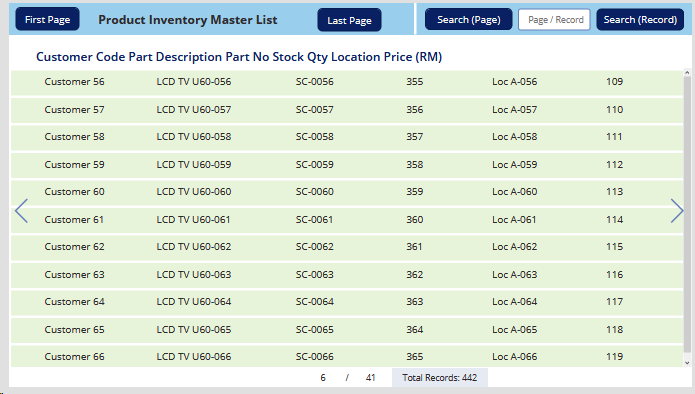
This is an excellent app that demonstrates many useful techniques, including searching (by record number and page number), and also labels to show the total records count, page number, and total page numbers. Here's a very brief summary of how this app works.
The first part of
To populate the data for any given page, the syntax of the Gallery control's Item property looks like this:
LastN(FirstN(DataSource, TotalRecordCountForCurrentPage), NumberOfRowsPerPage)
TotalRecordCountForCurrentPage is a numeric variable equal to this:
Current page number * Number of rows per page
The LastN/FirstN syntax displays the last batch of records for TotalRecordCountForCurrentPage, which equates to the batch of records that corresponds to the current page number.
The formula for the 'next page button' increments the TotalRecordCountForCurrentPage variable by the NumberOfRowsPerPage.
UpdateContext({TotalRecordCountForCurrentPage:TotalRecordCountForCurrentPage + NumberOfRowsPerPage}))
Conversely, the 'previous page button' decrements the TotalRecordCountForCurrentPage variable by the NumberOfRowsPerPage.
UpdateContext({TotalRecordCountForCurrentPage:TotalRecordCountForCurrentPage + NumberOfRowsPerPage}))
In
The 'first button' displays the first set of records by setting TotalRecordCountForCurrentPage to the NumberOfRowsPerPage.
UpdateContext({TotalRecordCountForCurrentPage:NumberOfRowsPerPage}))
The 'last button' displays the last batch by setting TotalRecordCountForCurrentPage to the total row count of the record source.
UpdateContext({TotalRecordCountForCurrentPage:CountRows(DataSource)}))
This is just the brief overview of how this works, and I recommend that you visit the forum post to see the full details. Well done PK!
