Themeing - How to apply consistant styles and themes to canvas apps with the CoE theming solution
With canvas apps, the built-in theming capabilities are limited - there's no way to edit the built-in templates through the Home > Theme menu item in the canvas designer.
To help apply consistent styles to the apps we build, there is a theming solution that is available as part of the Microsoft's CoE solution (centre of excellence).
This post introduces the capabilities of this theming solution, and describes the steps to install and to apply a theme.
The theming solution consists of 2 canvas apps - a theme editor app, and a theme gallery app. A designer creates a theme through the editor app. When the theme is complete, the designer uploads a template msapp file for new apps, and marks the theme as 'published'.

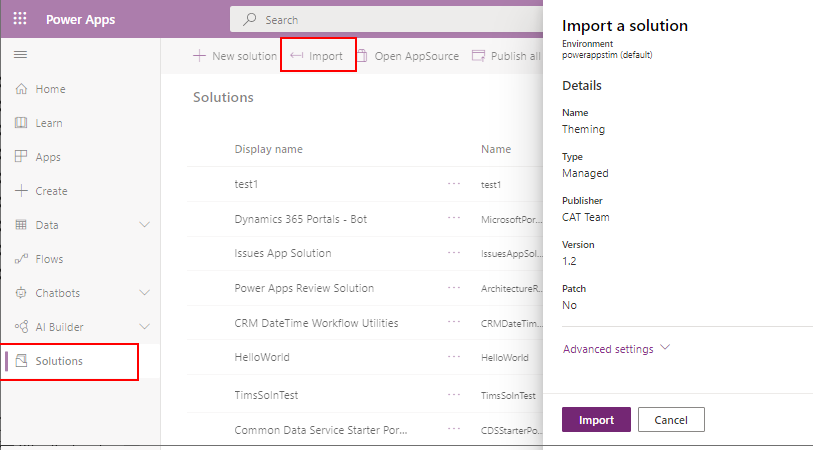
From the Maker Portal, we
click the 'Solutions' item from the left-hand menu, click the 'import'
button from the toolbar, and browse/select the
'Theming_1_2_managed.zip' file.
Preparing the msapp template files
How the msapp template file works
Browsing and using a template
Also, there is an excellent video here by the creator of the theming solution, Mehdi Andaloussi.
To help apply consistent styles to the apps we build, there is a theming solution that is available as part of the Microsoft's CoE solution (centre of excellence).
This post introduces the capabilities of this theming solution, and describes the steps to install and to apply a theme.
How does the theming solution work?
The theming solution is based on a set of Dataverse tables. It's possible to create one or more named themes and to specify the styles that apply to the theme. This can include default font settings, control colours, border settings, and radius settings (ie, the setting that applies the amount of rounding on the edges on buttons and controls).The theming solution consists of 2 canvas apps - a theme editor app, and a theme gallery app. A designer creates a theme through the editor app. When the theme is complete, the designer uploads a template msapp file for new apps, and marks the theme as 'published'.
App builders use the companion gallery app to view and to browse the published themes. Through the gallery app, app builders can download the template msapp file and use it as the basis for a new app.
One of the biggest benefits of this theming solution is that the styles apply automatically to any new controls that that app builders add to the app through the insert menu.
How to install the COE theming kit
To install the theming solution, we first download the CoEStarterKit from the link beneath:
This link downloads a zip file called CoEStarterKit.zip. The extracted content includes a file called Theming_1_2_managed.zip. This is the solution file that contains the theming solution.
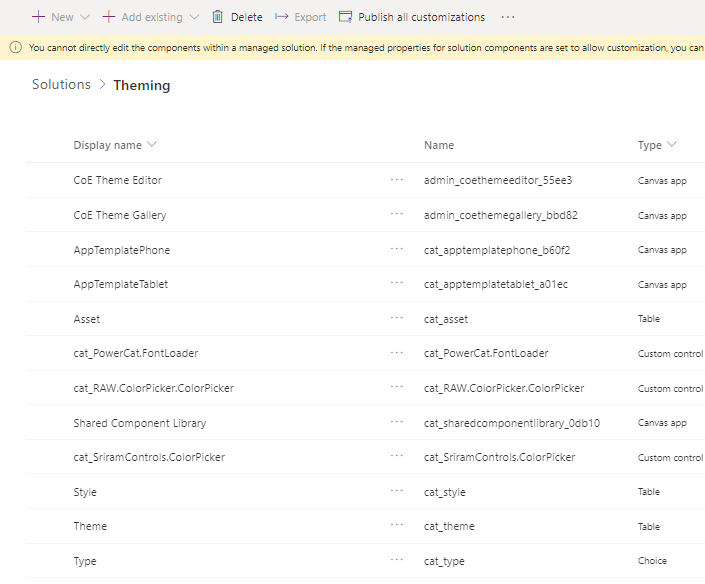
The screenshot beneath shows the content of the imported theming solution. Here, we see all the components that make up the solution including the two canvas apps, the template msapp files, and the Dataverse tables and objects. To complete the installation, we click the 'Publish all customizations' button in the toolbar.
Creating a theme with the Theme Editor
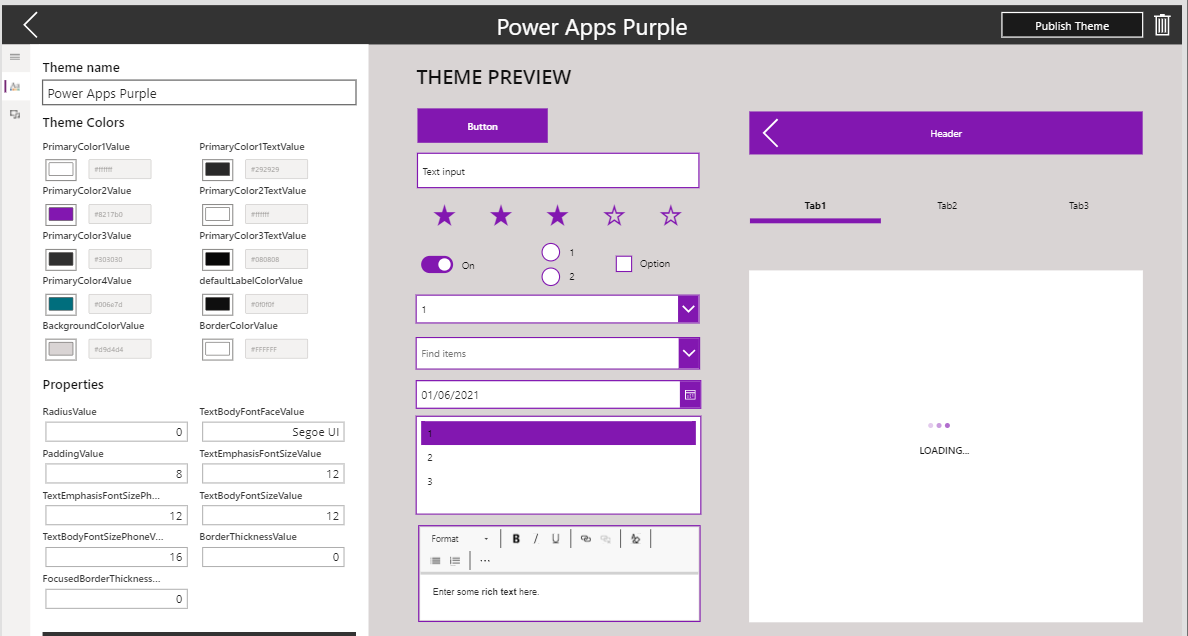
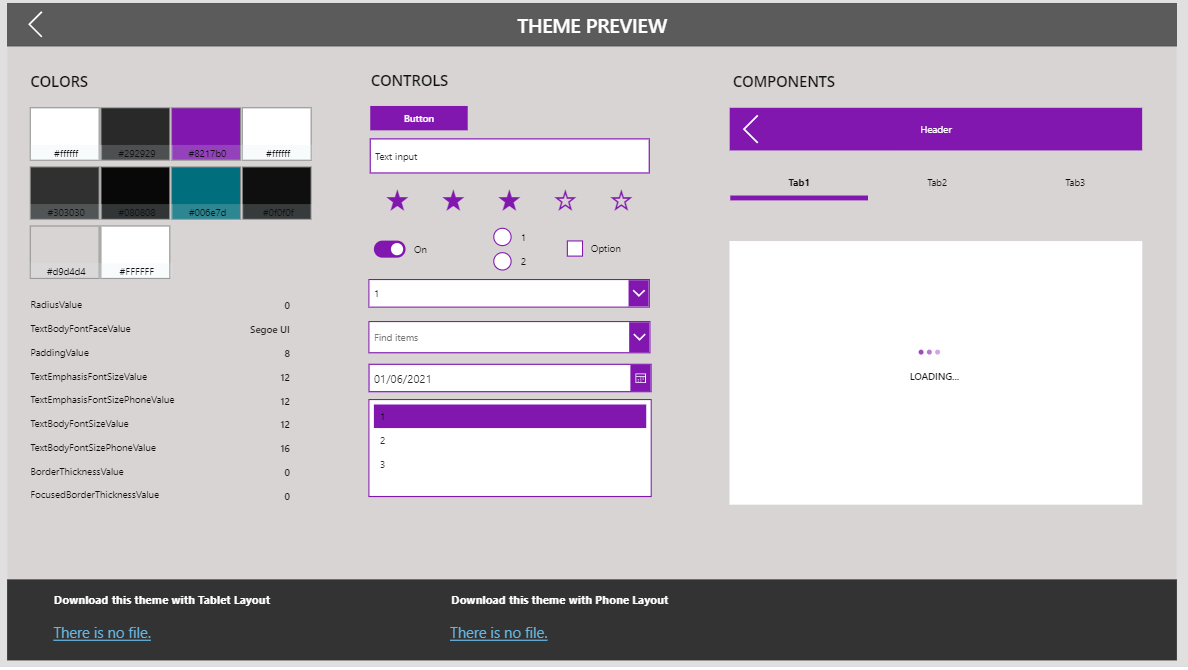
To create a theme, we start the CoE Theme Editor from apps list. When the editor app starts, we click the 'New Theme' link to create a new theme. In this example, I created a new theme called 'Power Apps Purple'. From the theme editor, we use the controls on the left-hand part of the designer to specify the theme colours, and theme properties. The theme properties include font sizes and values, padding sizes, and the radius value. As we change these settings, the theme preview section on the right-hand pane shows how the settings appear at runtime.
When we're happy with our theme, we click the publish button to open the publish screen.
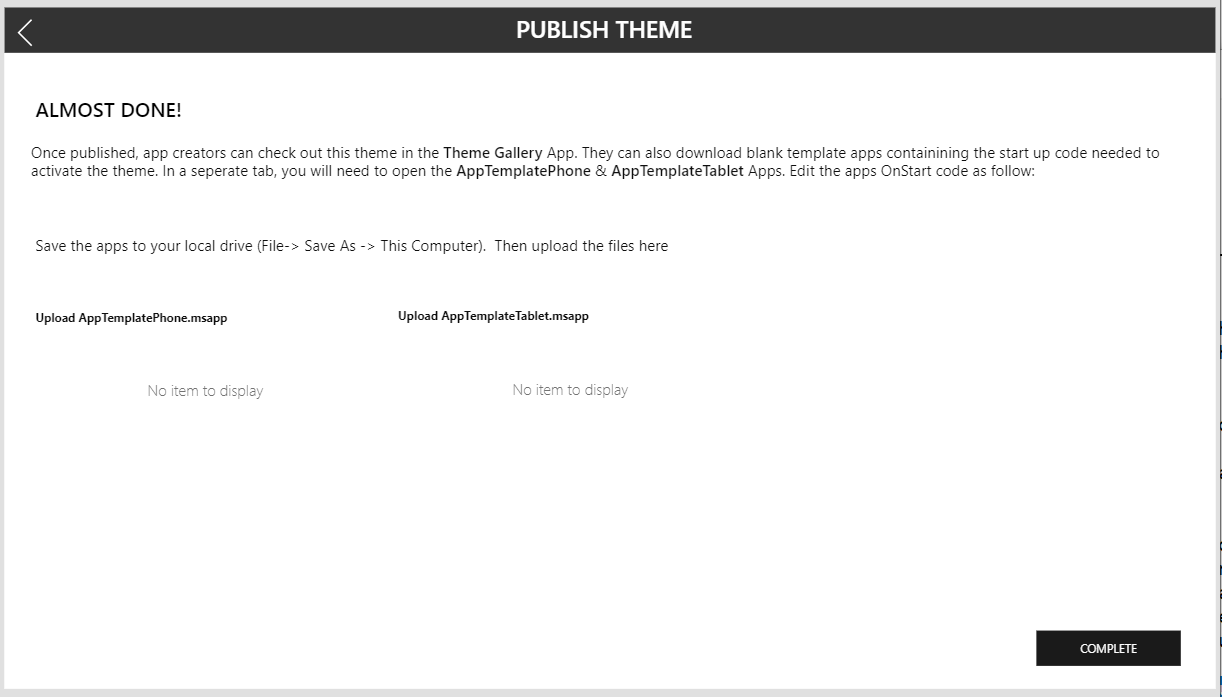
This screen enables us to prepare and to upload two msapp template files (a phone app template and a tablet app template). These are the templates that app builders will use to create new apps.
Before we publish the theme, let's look at how to prepare the msapp template file.
Preparing the msapp template files
To prepare the msapp files, we open the AppTemplatePhone and AppTemplateTablet files that are included as part of the solution.
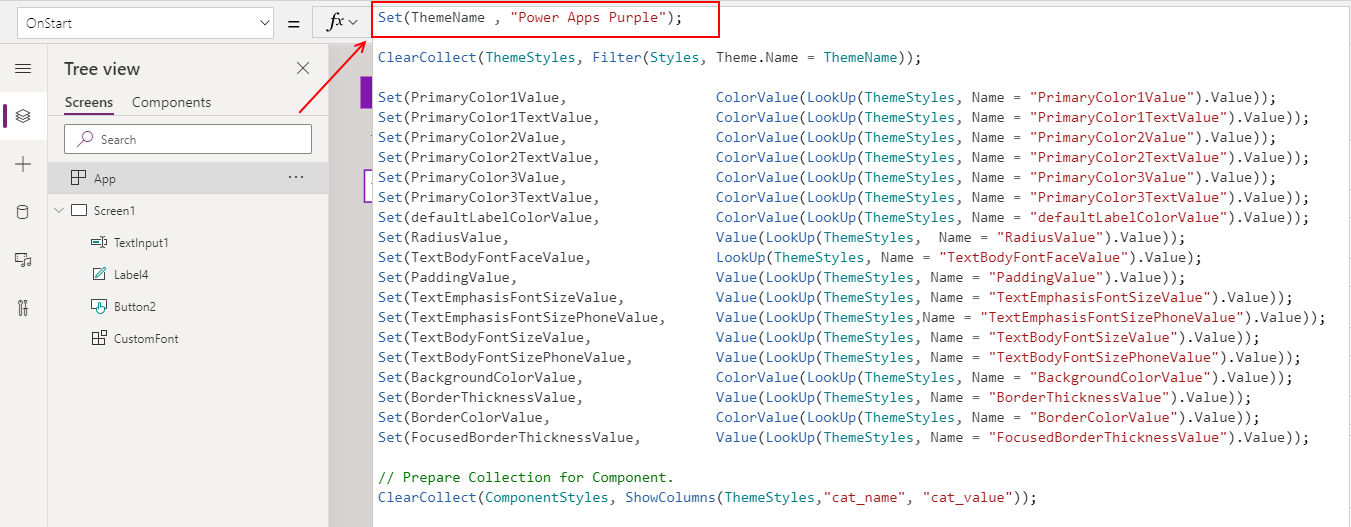
There Is one simple change that we need to make to the supplied msapp files. We modify the first line in the OnStart property to set a variable called ThemeName to the name of our target theme.
Set(ThemeName , "Power Apps Purple");
The remaining formula sets other variables that define the style settings that are associated with the chosen theme.
At this stage, we can save the app locally as an msapp file. We can then return to the theme editor, upload the msapp file, and publish the theme.
How the msapp template file works
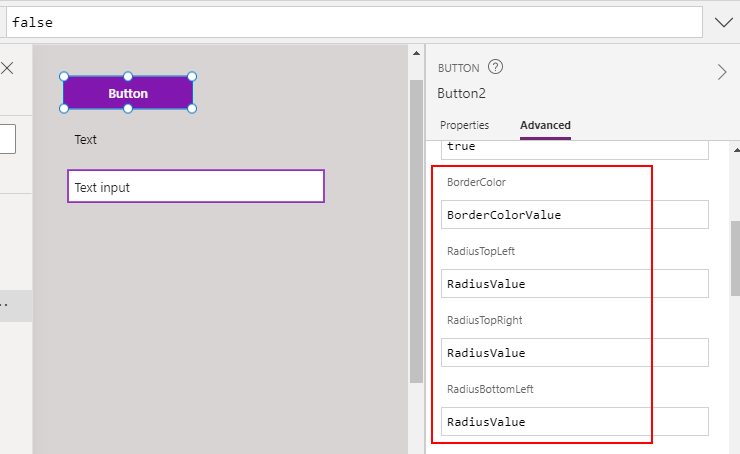
Let's take a closer look at the msapp template file. The formula that sets the ThemeName is the single line of code that is required to set a theme. App builders can change the theme of an app by setting the variable to a different theme.
Any controls that an app builder adds inherits the style settings of the theme. This is because by default, the properties of all controls reference the variables that are defined in the OnStart of the app.
Browsing and using a template
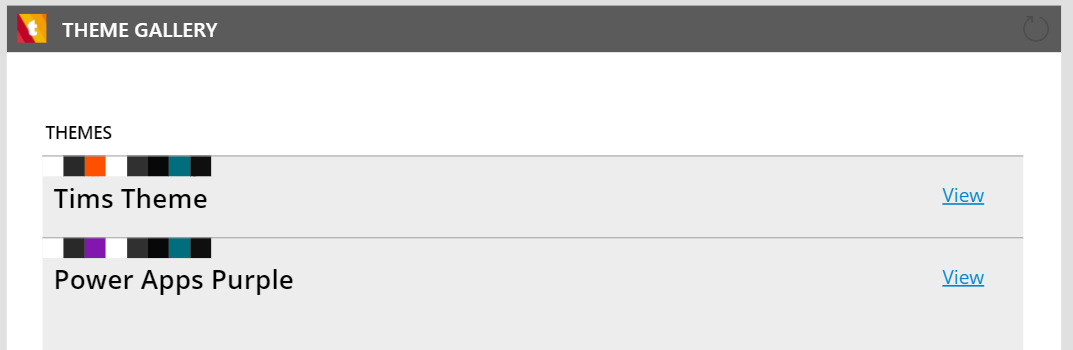
The theme creation process is now complete. An app builder can now run the theme gallery app to view the themes that have been published.
The app builder can preview the themes to see how they look at runtime. Through the preview screen, the app builder can download the corresponding msapp file and to use that as the basis for a new app.
Conclusion
The theming solution from the the CoE starter kit offers a great way to build apps that share the same
colours, font styles, and overall look and feel. This post described how to install and to use this solution.
For further reading, we can refer to the documenation here:
