Blog

New model driven app designer - a first look

A new, much improved model driven app designer is now available in preview! This post takes a first look at this designer, including how to access the designer, and a high level overview of the new features.

At the recent Microsoft Build conference in May, Microsoft announced the introduction of a new Power Apps designer.

Eventually, this new designer will merge the seperate canvas and model driven app designers, and provide a WYSIWYG (what you see is what you get) design experience for model driven apps.

The great news is that the preview version of the designer is now available. This post takes a first look at the highlights of this designer. We'll begin by finding out how to access the new designer.

Getting started with the new designer

To create a new app with the new designer, we choose the 'modern app designer' option when we create a new app.


To edit an existing app with the new designer, we click the Edit > 'Edit in preview' menu option from the app list.

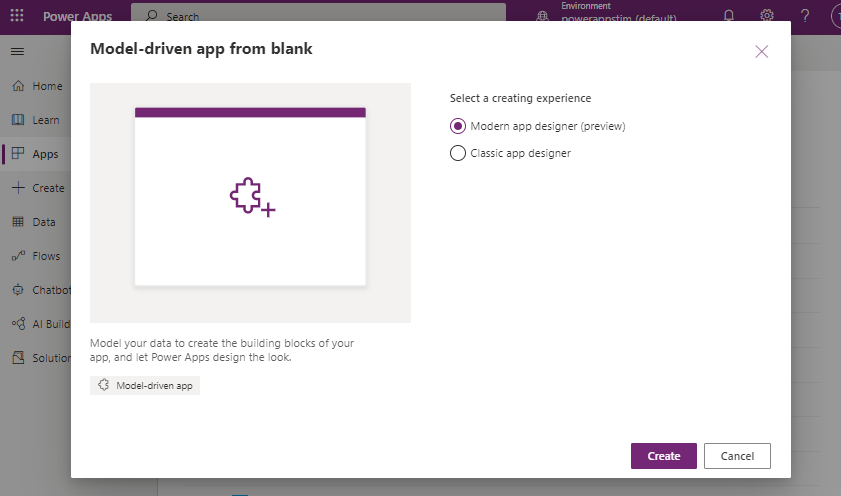
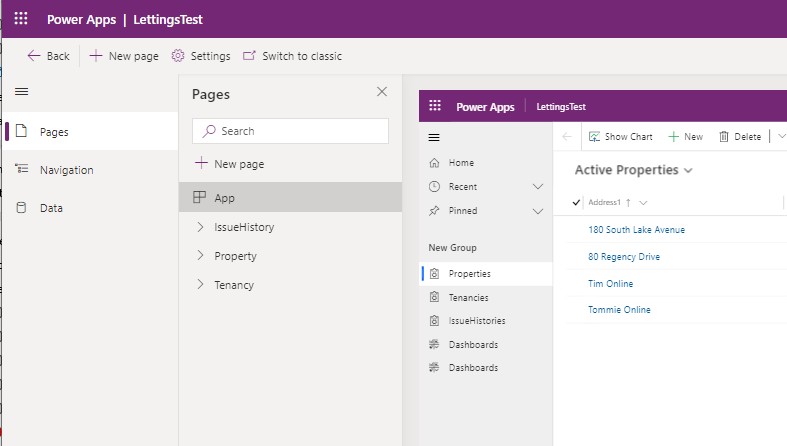
The parts that make up the designer

The screenshot beneath illustrates the new designer. Unlike the old model driven app designer, the new designer shows exactly how the app appears at runtime. We can see a preview of the app in the main body of the designer.

Along the left-hand panel of the designer, there are three items:
  • Pages - we use this to create and manage the pages in an app
  • Navigation - we use this to manage the navigation/menu items in an app
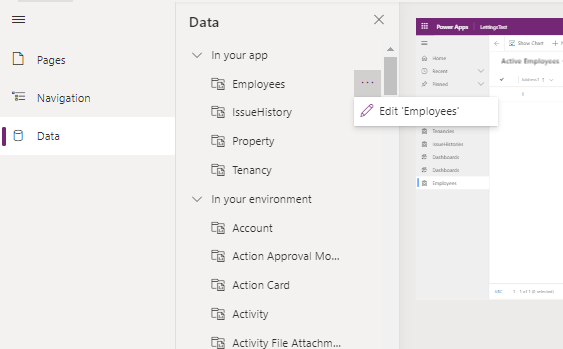
  • Data - this section displays the tables that are used in an app


Along the menu bar, we can edit the app settings and we can switch to the old designer by clicking the 'switch to classic' button. The classic designer enables us to access settings that are not yet available in the new designer.

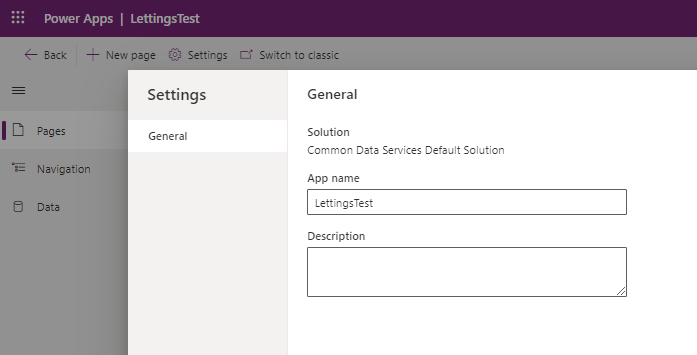
Editing the App Settings
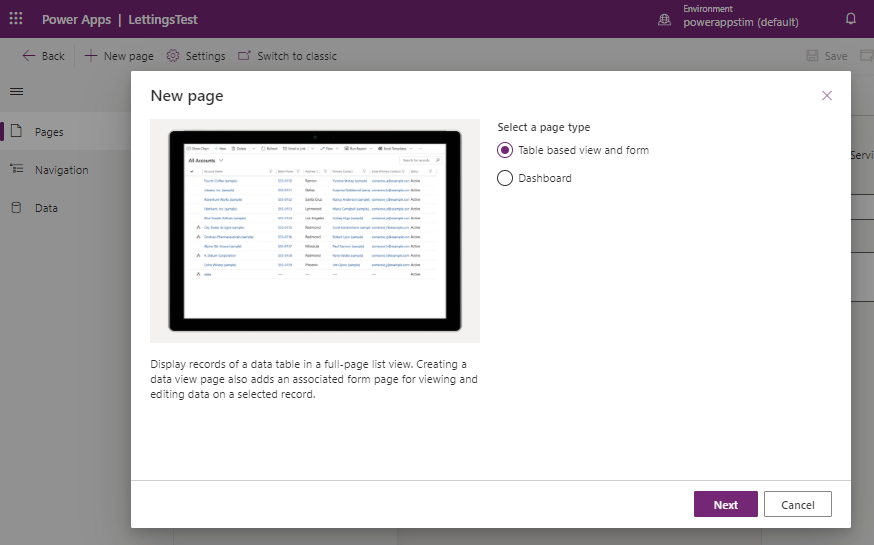
The settings button opens the dialog that's shown beneath. We can use this to set the app name and description. It's currently not possible to set the app icon or welcome page. To do this, we would need to switch back to the classic designer.

Managing Pages

From the pages section, we can manage the pages in an app and we can add new pages. A page defines content that a user can access through the navigation menu. There are 2 page types that we can create - 'a table based view and form' page, or a dashboard. Eventaully, we'll be able to add a 'canvas app' page to an app.


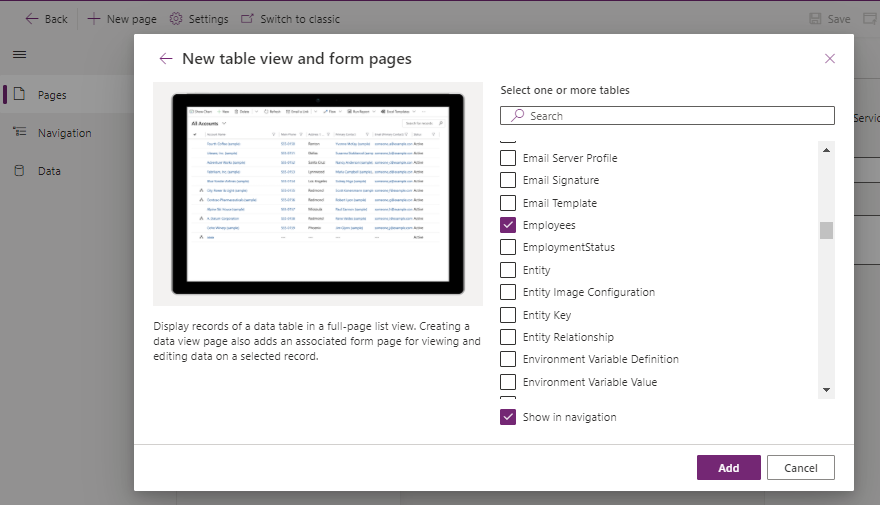
To display the contents of a table in a page, we select the 'table based view and form' option. The designer enables us to select the target table. At runtime, a user can view the records in the table, and can edit or add new records through a form.


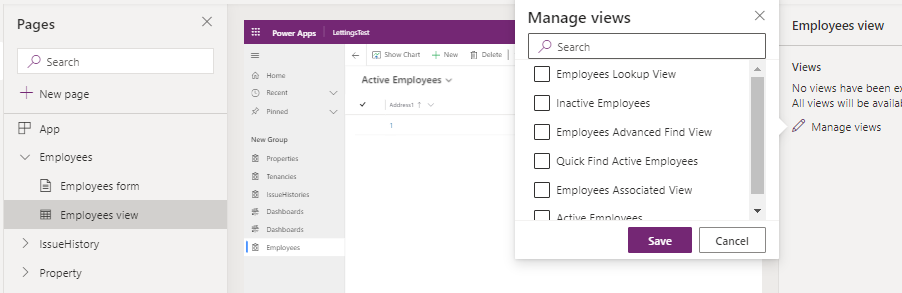
When the new page appears in the designer, we can use the items beneath the page in the left hand panel to access the data entry form, and to manage the views for displaying lists of records.

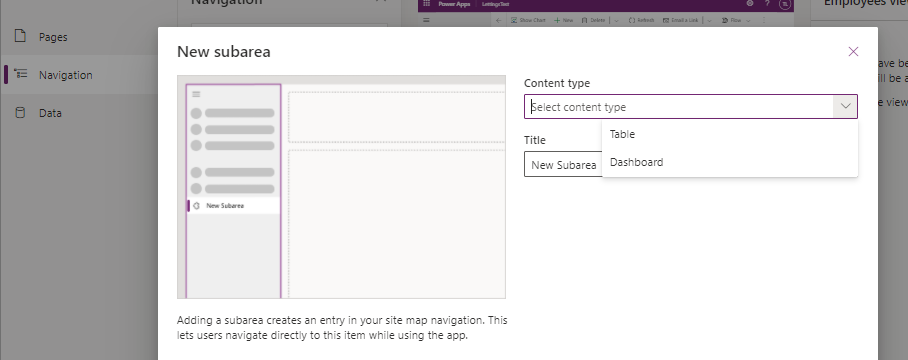
Defining the menu items in an app

From the navigation panel, we can manage the navigation/menu items in an app. The add button enables us to add one of two navigation items - a group, or a subarea. These terms match the existing terms in the 'site map' part of the old designer.


A subarea creates a menu item that opens a 'table page' or a dashboard. A group provides a visual grouping of 'subarea' menu items in the navigation menu..

Managing the data in an app

The Data section of the designer shows the tables that are in-use. It also shows all other available Dataverse tables. Against each table, we can click a menu item to edit the table. This opens the table designer in the new browser tab

Conclusion

The new model driven app designer is an enormous improvement over the old designer. Unlike the old designer, the WYSIWYG designer makes it much easier to see the effect of our changes . The new terminology (such as pages and tables) is also far more intuitive. Hopefully, these changes will make model driven apps more accessible and appealing for all Power App users.