Controls - How to set the data source of a Combo Box to a comma separated string
This can occur when we want to display combo box values from a variable, custom connector, web service, or some other third-party data source.
How to set the data source of a combo box to CSV string
To demonstrate, let's take the example of a comma-separated list of days that looks like this:
"Monday, Tuesday, Wednesday, Thursday, Friday, Saturday, Sunday"
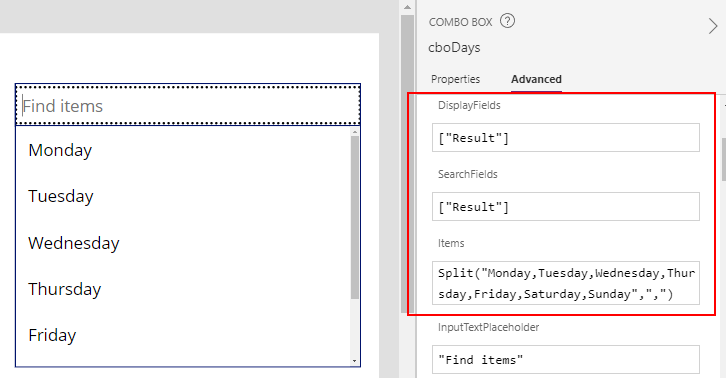
To configure a combo box control to display each day name, we would set the items property of the combo box control like so:
Split(
      "Monday,Tuesday,Wednesday,Thursday,Friday,Saturday,Sunday",
      ","
)
The Split function takes two input values - an input string and the separator character. It returns a single value table with the column name 'Result'. Therefore to display this output in a combo box, it's important to specify the Display Fields value - [''Result'].
In practice, source values can often include leading or trailing spaces between each item. To remove these extraneous spaces, we can call the substitute function on the input string to replace instances where there is an extra space following each comma. We would set the items property of the combo box control like so
Split(
      Substitute(
          "Monday, Tuesday, Wednesday, Thursday, Friday, Saturday, Sunday",
          ", "
      ),
      ","
)
How to set the selected combo box items
To set the selected items in a combo box, we set the DefaultSelectedItems property. Let's assume we want to select the items Tuesday and Thursday. We would set the default selected items property of the combo box like so:
Split("Tuesday,Thursday",
      ","
)
What to do when the selected combo box items don't display
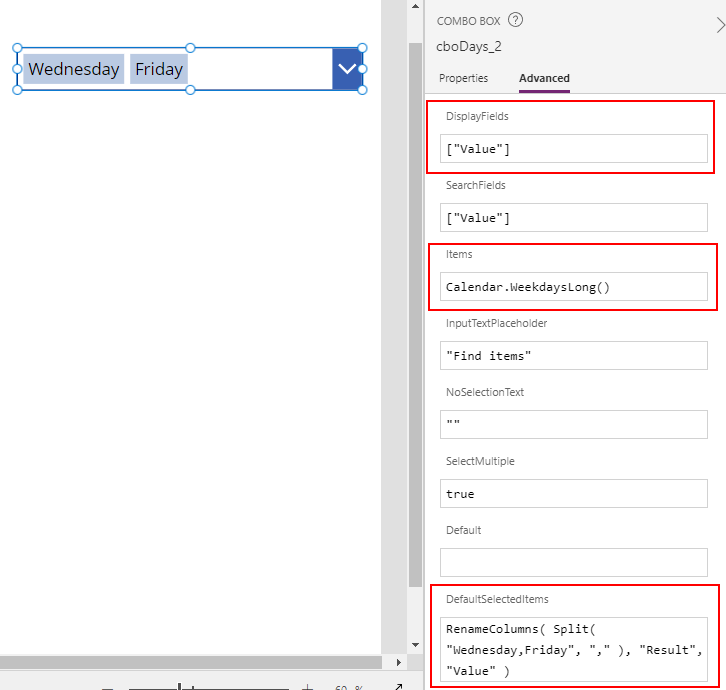
As an example, let's take a variation where we set the Items property of the combo box to Calendar.WeekdaysLong. This is a built-in function that returns all the days of a week. It returns a single value table with the column name "Value".
Calendar.WeekdaysLong()
Since the return value from Split function is a table with the column name "Result", we must rename this to "Value". Here's the formula to set the values Wednesday and Friday.
RenameColumns(
      Split(
         "Wednesday,Friday",
          ","
      ),
      "Result",
      "Value"
)
How to retrieve a comma-separated list of selected combo box items
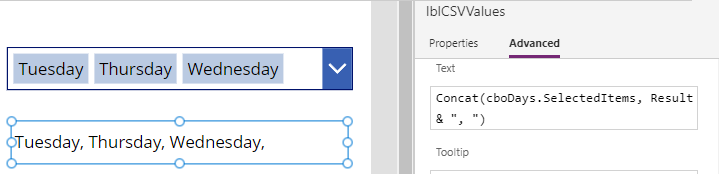
Finally, an associated requirement to is output the selected items in a combo box control as a comma-separated string. We can accomplish this by calling the Concat function like so.
Concat(cboDays.SelectedItems, Result & ", ")
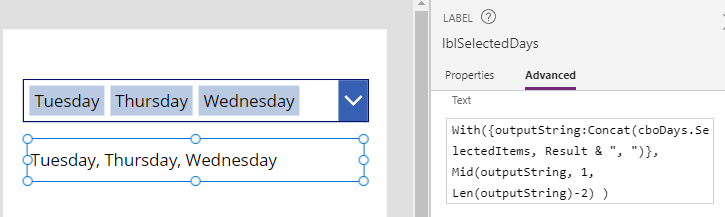
How to strip trailing commas
With({outputString:Concat(cboDays.SelectedItems, Result & ", ")},
     Mid(outputString, 1, Len(outputString)-2)
)