Dataverse - How to create Entity Relationship diagrams
Dataverse databases can often contain many custom tables. When developing apps and systems, it can be very useful to generate a visual relationship diagram so that we can see the linkages between tables and to better understand the schema.
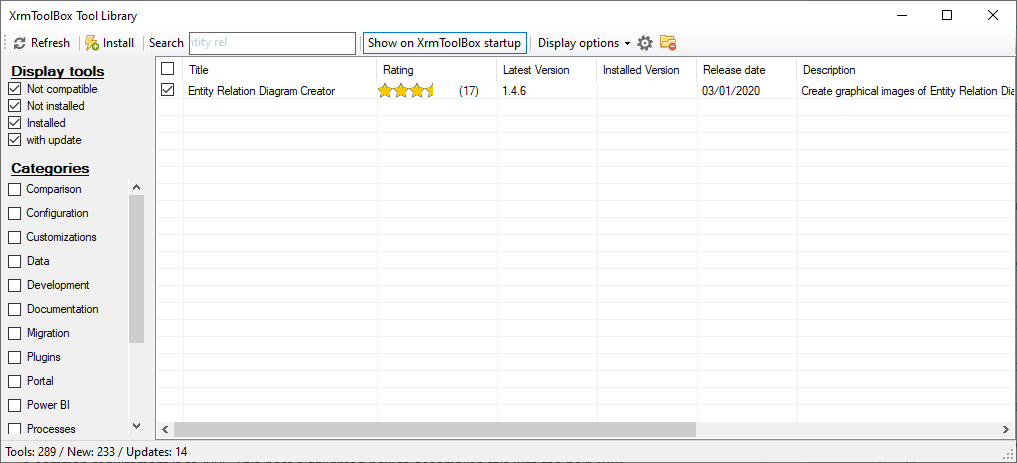
One way to do this is to use the Entity Relation Diagram Creator (by Bas van de Sande) in XrmToolBox. This post describes how to use this utility and summarises its key features.Getting Started
Once XrmToolBox is installed, we can open the Tool Library. From here, we can search for and install the Entity Relation Diagram Creator.
Defining the tables to include in the diagram
Starting the Entity Relationship Diagram Creator
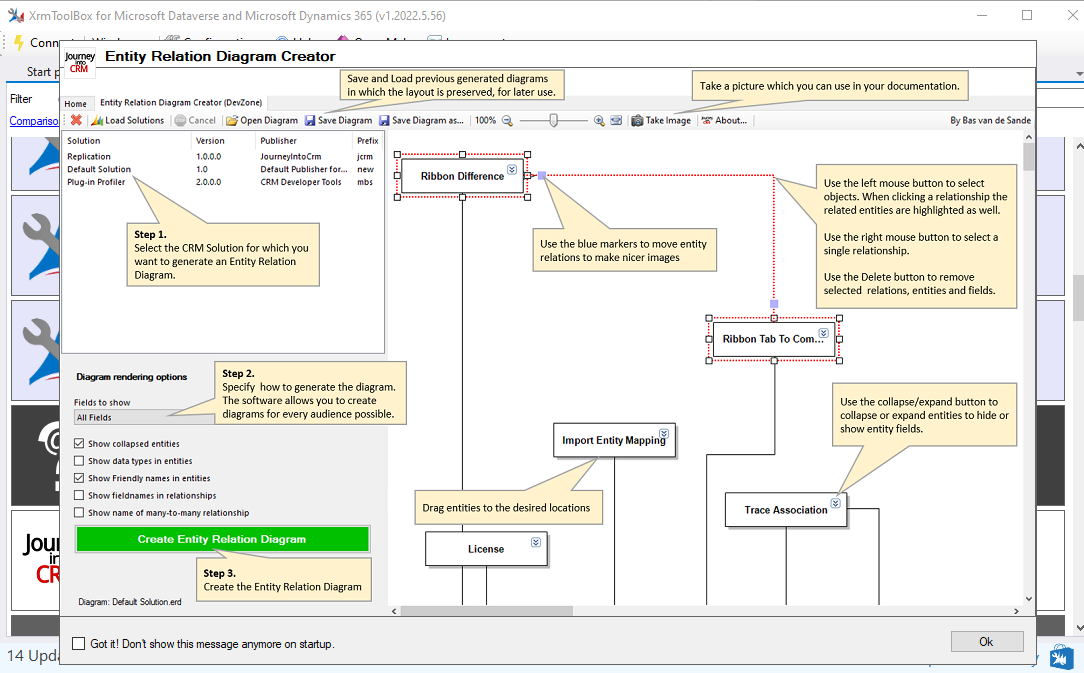
When we start the
Entity Relationship Diagram Creator, the following initial screen appears. This is a useful screen that provides full instructions on how to use the utility.
How to create a diagram using the Entity Relationship Diagram Creator
One way to do this is to use the Entity Relation Diagram Creator (by Bas van de Sande) in XrmToolBox. This post describes how to use this utility and summarises its key features.
Getting Started
The first step is to download and install XrmTooBox. There are full instructions on how to do this on the website.
Once XrmToolBox is installed, we can open the Tool Library. From here, we can search for and install the Entity Relation Diagram Creator.
Defining the tables to include in the diagram
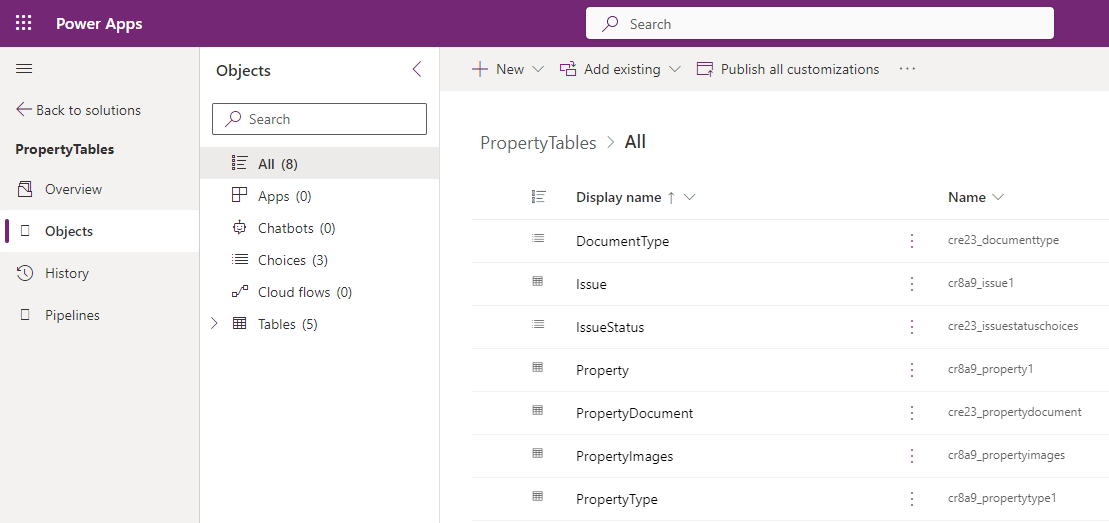
With the Entity Relationship Diagram creator, we can specify the target tables for the diagram either one by one, or we can specify a solution that contains all the required tables.
We can create a new solution through the Power Apps Maker Portal. For this demonstration, we'll create a solution called PropertyTables with the following tables.
We can create a new solution through the Power Apps Maker Portal. For this demonstration, we'll create a solution called PropertyTables with the following tables.
Starting the Entity Relationship Diagram Creator
When we start the
Entity Relationship Diagram Creator, the following initial screen appears. This is a useful screen that provides full instructions on how to use the utility.How to create a diagram using the Entity Relationship Diagram Creator
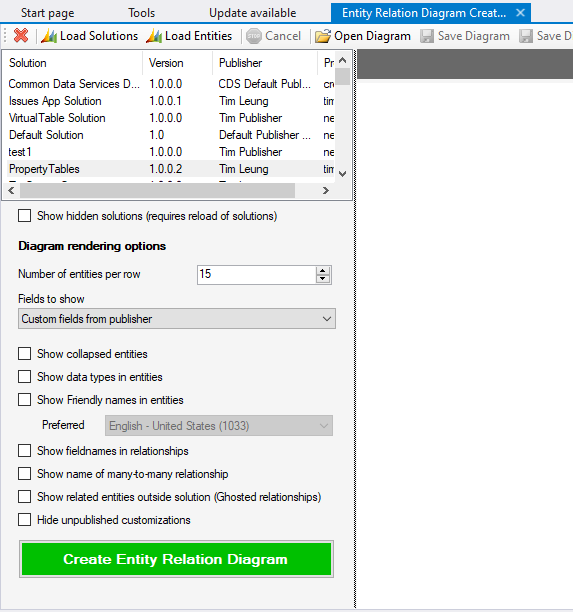
The first step is to either click the 'Load Solutions' or 'Load Entities' (ie, Dataverse Tables) button. This will load the available solutions or tables into a list control.
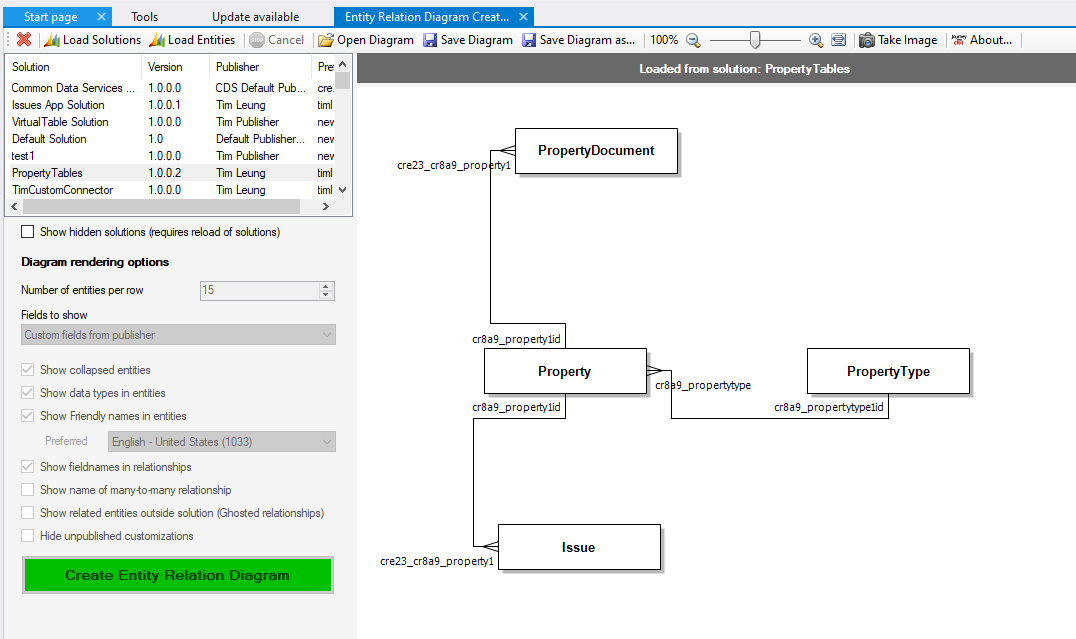
In this example, we'll click the Load Solutions button and the screenshot below illustrates the result and the diagram rendering options.
A good option is to select the 'Show friendly names in entities' option in order to display the friendly table names in the diagram titles.
To generate the diagram, we click the green 'Create Entity Relation Diagram'. The utility will take a moment to connect to Dataverse and to generate the diagram. The screenshot below illustrates the output.
We can use the design canvas to reposition the tables in the diagram. We can click the 'Take Image' button to generate a PNG image of the diagram. We can also click the 'Save Diagram' button to save a local copy of the diagram. This button saves the diagram with a '.erd' extension. The content of the file contains an XML representation of the diagram. We can open saved files at a later point in time (and to further edit them if needed) by clicking the Open Diagram button.
Conclusion
To create Entity Relationship (ER) diagrams against Dataverse tables, we can use the Entity Relation Diagram Creator utility from within XrmToolBox. This post summarised the main features of this utility, including how to generate a diagram.
