Email - How to send email without the Office 365 Outlook connector (using the Mail connector)
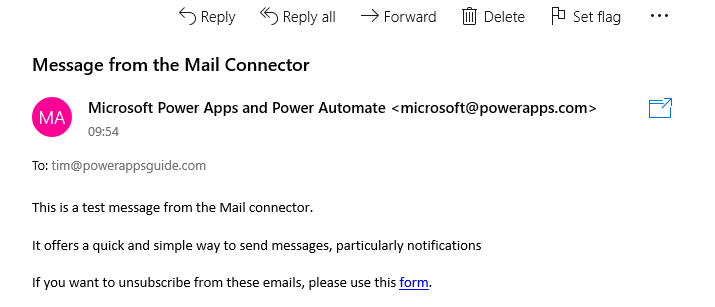
The Mail connector provides a simple way to send email messages. Any messages we send through this connector will come from the 'Microsoft Power Apps' email address ([email protected]), as shown in the screenshot beneath.
Why use the Mail connector? What are the benefits?
The benefit of the Mail connector is that it provides a quick and easy way to send email from
an app, particularly in cases where we don't have email accounts set up.For example, there are organisations that use Microsoft 365, but use on-premises instances of Microsoft Exchange, or some other mail server. This type of setup can prevent the use of the more popular Microsoft 365 Outlook connector. Alternatively, an organisation that uses Microsoft Exchange online may not have have provisioned email accounts for all Power App users.
The reason why the Mail connector is very simple to use is because unlike the SMTP, Gmail, or other mail connectors, there's no additional setup that's required. There's no need to configure details such as credentials or email server addresses.
The Mail connector is ideal in cases where we want to send infrequent messages, or notifications from a Power App.
What are the limitations of the Mail connector?
All messages include an unsubscribe link (as shown in the screenshot above). If a user clicks this link, the user will no longer receive any messages that we send through the connector. It's not possible to remove the unsubscribe link from the messages that we send.
Another important point is that Microsoft make no guarantees about the reliability of this connector. There's a greater likelihood for lost emails, partly because it's easy for spammers to send messages using this connector which results in a greater probability for organisations to block [email protected].
Another important point is that Microsoft make no guarantees about the reliability of this connector. There's a greater likelihood for lost emails, partly because it's easy for spammers to send messages using this connector which results in a greater probability for organisations to block [email protected].
In cases where we need a more reliable email service, Microsoft recommends the Office365 Outlook connector. My post here provides more details on how to use the this connector.
http://powerappsguide.com/blog/post/email-how-to-send-emails-office-365-outlook-connector
http://powerappsguide.com/blog/post/email-how-to-send-emails-office-365-outlook-connector
Prerequisite steps
To
send messages with the Mail connector, the first step is
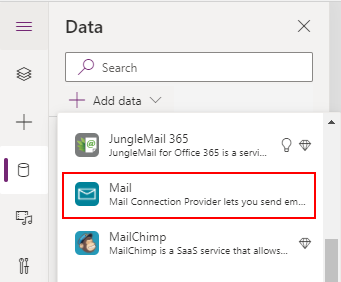
to add the connector to our app through the data panel.
Once
we do this, we can reference the Mail connector in formula.If we add a button and reference the Mail connector in the OnSelect property of the button, we
see two methods - SendEmail and SendEmailV3.
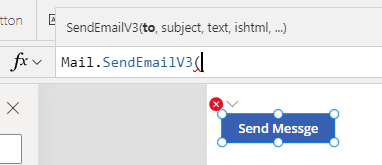
SendEmailV3 method is the most up-to-date method and this is the one that we should use. For reference, the full documention for this connector is here:
1. Sending an email - simple usage
Starting
with the most basic usage of the SendEmailV3 method, here's how to send
a message to a recipient (in text format), and how to specify the message subject and
body.
Mail.SendEmailV3("[email protected]",
                 "Enter the email title here",
                 "Enter your email message here",
                 false
)
The 4th agument specifies whether the email body is in HTML format. If we set this to true, we can pass an email body in HTML format.
Here's an example of a common task - how to
add a line break to the message body by adding the HTML tag that
represents a line break, which is <br>.
2. Sending an email to multiple recipients
Mail.SendEmailV3("[email protected]",
                 "Enter the email title here",
                 "Line 1 of the message body <br> Line 2 of the message",
                 true
)
2. Sending an email to multiple recipients
To send a message to multiple recipients, we can separate each email address by a comma or a semicolon delimited list like so:
Mail.SendEmailV3("[email protected]; [email protected]",
                 "Enter the email title here",
                 "Enter your email message here",
                 false
)
3. Setting the recipients display name
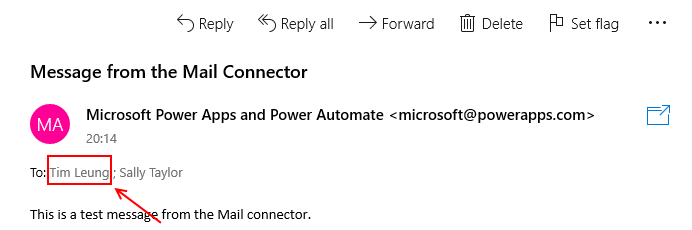
To specify recipient display names, we pass a record as the fitfth argument to the SendEmailV3
method. The field name that we use for this record is "cc", and we specify a comma or semicolon separated list of display names in the "toname" field that corresponds to the recipients.
Mail.SendEmailV3("[email protected]; [email protected]",
                 "Enter the email title here",
                 "Enter your email message here",
                 false,
                 {
                    toname:"Tim Leung;Sally Taylor"
                 }
)
As the screenshot beneath shows, the recipient display name appears in the 'to' address of the email.
4. Adding CC recipients to a message
To specify CC
recipients, we specify the recipients in the record that we pass as the fifth argument. The field name for this record is "cc". Note that
the capitalisation - cc is all in lower case.
To provide more than a single CC recipient, we provide a comma or semicolon separated list of email addresses. We can also specify the CC display names by providing a comma or semicolon list in a field called "ccname".
Mail.SendEmailV3("[email protected]",
                 "Enter the email title here",
                 "Enter your email message here",
                 false,
                 {
                    cc:"[email protected];[email protected]",
                    ccname:"James;Jill"
                 }
)
5. Adding BCC recipients to a message
The
syntax to add BCC recipients works in the same way as CC recipients.
Here's how to send a message that includes both CC and BCC recipients.
Mail.SendEmailV3("[email protected]",
                 "Enter the email title here",
                 "Enter your email message here",
                 false,
                 {
                    cc:"[email protected]",
                    bcc:"[email protected];[email protected]",
                    bccname:"Mike Jones;Jane Smith"
                 }
)
6. Adding an attachment from SharePoint
The Mail connector enables us to attach a file. As an example, let's suppose we take a
SharePoint record with file attachments. If we add a card to a
detail form, the syntax that to include the first file attachment to
an email message looks like this:
Mail.SendEmailV3("[email protected]",
                 "Enter the email title here",
                 "Enter your email message here",
                 false,
                 {
                    files:First(ThisItem.Attachments).Value,
                    filenames:First(ThisItem.Attachments).DisplayName
                 }
)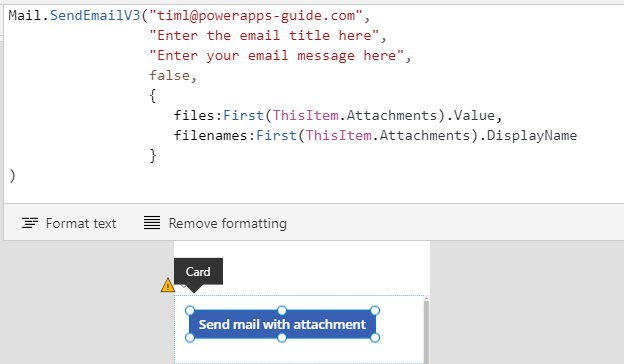
We pass blob attachment in a field called "files" and the filename in a field called "filenames".
7. Attaching an image that a user selects using the 'add picture' control
A
variation of the previous example, here's how to allow a
user to choose an image from their local computer using an 'add picture'
control, and to attach the selected image to an email.
First, we add an 'add picture' control to a screen. We can then use the formula beneath to send an email that includes the image that the user selects.
First, we add an 'add picture' control to a screen. We can then use the formula beneath to send an email that includes the image that the user selects.
Mail.SendEmailV3("[email protected]",
                 "Enter the email title here",
                 "Enter your email message here",
                 false,
                 {
                    files:UploadedImage1.Image,
                    filenames:"myImageName.jpg"
                 }
)
The
add picture control is a composite control, meaning that it includes a
child image control that displays the image that the user uploads. In
this case, the name of this control is UploadedImage1. This is the
control that we use to retrieve the uploaded image.
Conclusion
The Mail connector provides a simple way to send email messages, and is ideal in cases where we want to send infrequent messages, or notifications from a Power App. This post described how to send messages using this connector, including how to specify multiple recipients, CC/BCC recipients, and how to include attachments.
