Email - Sending messages with SMTP connector
Almost all ISPs and email providers offer the ability to send messages through SMTP. Therefore, the SMTP connector is valuable because provides a universal method to send email messages.
The SMTP protocol also opens the possibility to connect to custom email providers that offer value-added services, such as the ability to better track the delivery of messages. Trilio SendGrid and Mailgun are two popular services.
This post walks through how to use this SMTP connector from Power Apps, including how to carry out tasks such as how to send messages with attachments.
Prerequisite steps
To send messages with the SMTP connector, the first step is to add the connector to an app
through the data
panel. The connector requires an SMTP server address, username, password, and SMTP server port (usually port 25) details. We can also select a checkbox to specify whether to send messages over an encrypted SSL connection. Our email provider will provide the details of the credentials that are needed.
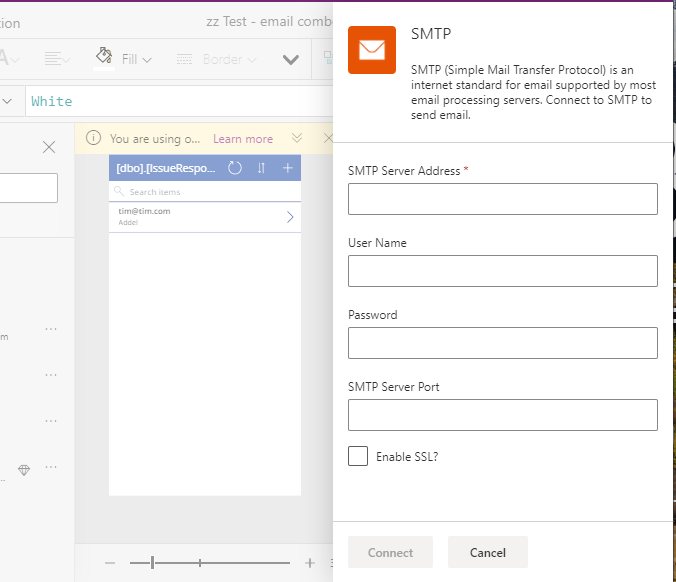
Power Apps will add the connection as a shared/implicit connection. This means that we must share the connection with the users of the app. A caveat of using a shared connection is that end users can create a new app, and reuse the shared connection to send messages. Therefore, it's important to assess whether this is acceptable, and whether it raises any security concerns..
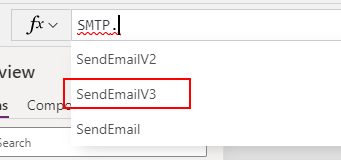
Once
we add the SMTP connector, we can access a method called SendEmailV3. This is the most up-to-date method that is available to send email messages.
For
reference, the full documention for this connector is
here:
1.
Sending an email - simple usage
Starting
with the most basic usage of the SendEmailV3 method, here's how to send
a message to a recipient, and how to specify the message subject and
body.
SMTP.SendEmailV3({From:"[email protected]",
                   To:"[email protected]",
                   Subject:"Enter email subject here",
                   Body:"Enter email body here"}
)
To define whether our email email content contains HTML or plain text, we set IsHTML flag to true or false.
2. Sending an email
to multiple
recipients
SMTP.SendEmailV3({From:"[email protected]",
                   To:"[email protected]",
                   Subject:"Enter email subject here",
                   Body:"Enter email body here",
                   IsHTML:true}
)
2. Sending an email
to multiple
recipients
To send a message to multiple recipients, we specify a semicolon
delimited string like
so.
SMTP.SendEmailV3({From:"[email protected]",
                   To:"[email protected];[email protected]",
                   Subject:"Enter email subject here",
                   Body:"Enter email body here"}
)
3.
Adding CC / BCC recipients to a
message
To specify CC or BCC recipients, we can sepcify the recipients like so:
SMTP.SendEmailV3({From:"[email protected]",
                   To:"[email protected];[email protected]",
                   CC:"[email protected];[email protected]",
                   Bcc:"[email protected];[email protected]",
                   Subject:"Enter email subject here",
                   Body:"Enter email body here"}
)
An important thing to note is the casing of CC and Bcc, because the syntax is case sensitive.
5.
Setting the Read Receipt, and Delivery Receipt addresses
We can use to ReadReceipt and DeliveryReceipt attributes to specify the email addresses to receive a notification when the message reaches the recipient, or when the recipient opens the message.
Note that recipient email clients will request confirmation before sending these delivery receipts. Therefore, setting read/delivery receipts do not provide a complete guarantee that the recipient has received a message.SMTP.SendEmailV3({From:"[email protected]",
To:"[email protected]",
DeliveryReceipt:"[email protected]",
ReadReceipt:"[email protected]",
Subject:"Enter email subject here",
Body:"Enter email body here"
}
)6.
Setting the importance of a
message
To set the importance
of message, we provide a string value that represents the importance.
There are 3 valid values - "High", "Low", and
"Normal".
SMTP.SendEmailV3({From:"[email protected]",
                   To:"[email protected]",
                   Subject:"Enter email subject here",
                   Importance: "High"
                   Body:"Enter email body here"}
)
7.
Adding attachments
Finally,
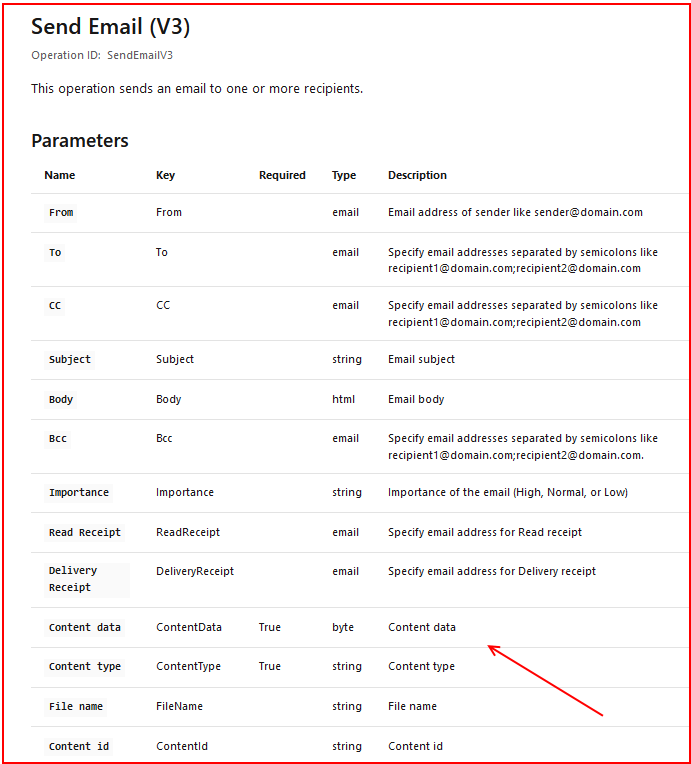
we can include one or more attachments by specifying a table of attachments. The SendEmailV3 method expects to
receive a table called Attachments, that contains the column names "FileName", "ContentId", "ContentData", and "ContentType".
One thing to note is that at the time of writing, the documentation for the SendEmailV3 method is incorrect. It suggests that we can pass a single set of "FileName", "ContentId", "ContentData", and "ContentType" values. If we pass a single attachment using this scheme, the resulting email will not contain the attachment and there will not be any error.
To demonstrate the correct syntax, this is the formula that we would use to attach an image from an add image control:
SMTP.SendEmailV3({From:"[email protected]",
                   To:"[email protected]",
                   Subject:"Enter email subject here",
                   Body:"Enter email body here",
                   Attachments: Table(
                     {
                       FileName: AddMediaButtonSMTP.FileName,
                       ContentId: 1,
                       ContentData: UploadedImageSMTP.Image,
                       ContentType: "application/octet-stream"
                     }
                   )
                  }
)
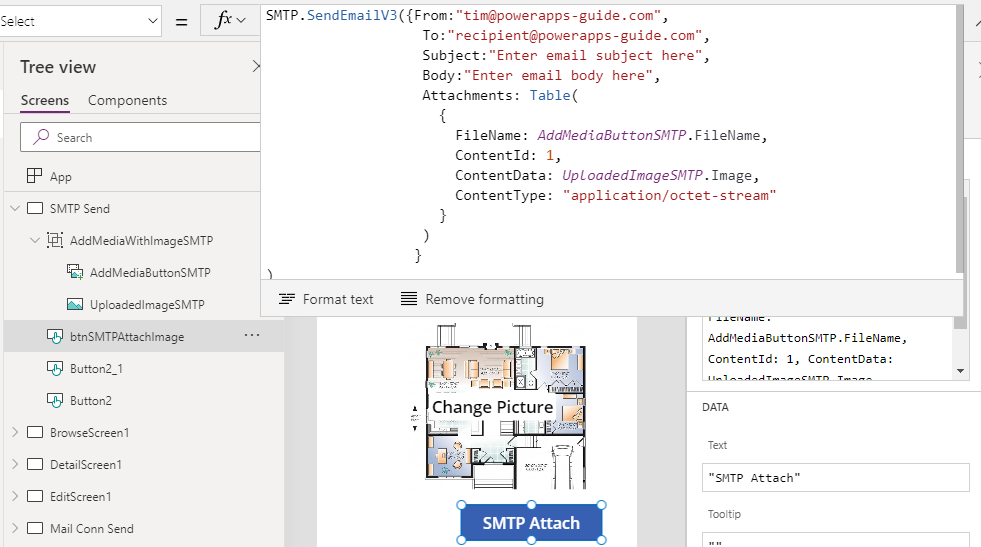
To attach additional files, we can specify additional rows within the Table function.
For additional information, we can refer to my previous post here on how to send attachments with the Office365 connector. The syntax that we use will be broadly very similar.
http://powerappsguide.com/blog/post/sending-email-attachments-with-office-365-outllok
For additional information, we can refer to my previous post here on how to send attachments with the Office365 connector. The syntax that we use will be broadly very similar.
http://powerappsguide.com/blog/post/sending-email-attachments-with-office-365-outllok
