Walkthrough - An beginners guide to building an app that stores images in SharePoint
In the early days of Power Apps, there was no direct support for SharePoint images. To store images in SharePoint, app builders would base 64 encode the images and store the text content in text columns.
For at least a couple of years, Power Apps has supported SharePoint image columns. This might not be obvious due to the number of questions that I see on this subject, particularly from beginners and from those who are attempting and struggling to base 64 image content by calling the JSON fuction.
For at least a couple of years, Power Apps has supported SharePoint image columns. This might not be obvious due to the number of questions that I see on this subject, particularly from beginners and from those who are attempting and struggling to base 64 image content by calling the JSON fuction.
Therefore, this post walks through the steps to build an app that stores images in SharePoint.
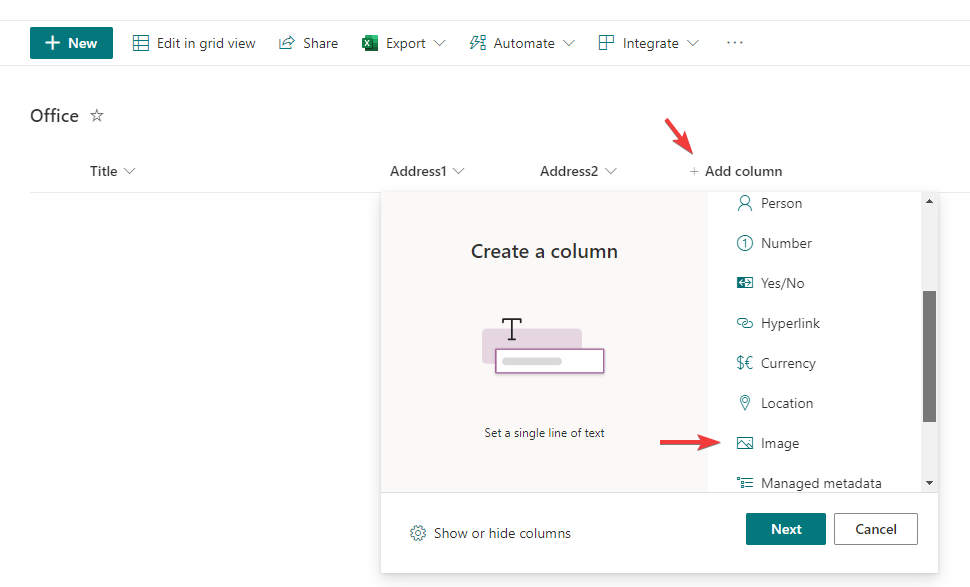
Setting up an Image column in SharePoint
To store images in SharePoint, the first step is to create a SharePoint list with a SharePoint image column. For this example, we'll create a list called Office with an image column called OfficeImage. We add an Image column as shown in the screenshot beneath.
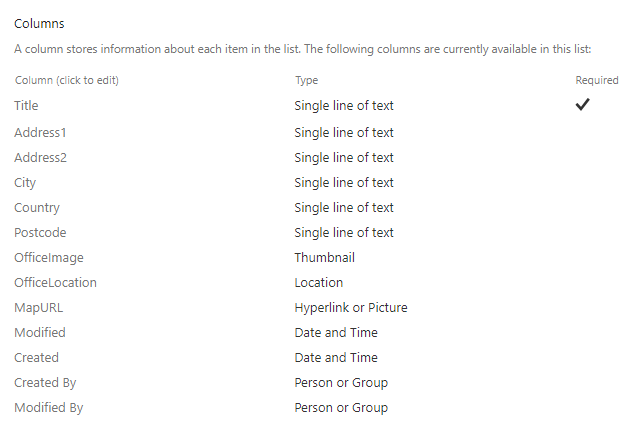
The structure of our Office list looks like this:.
Creating a Power App that connects to SharePoint
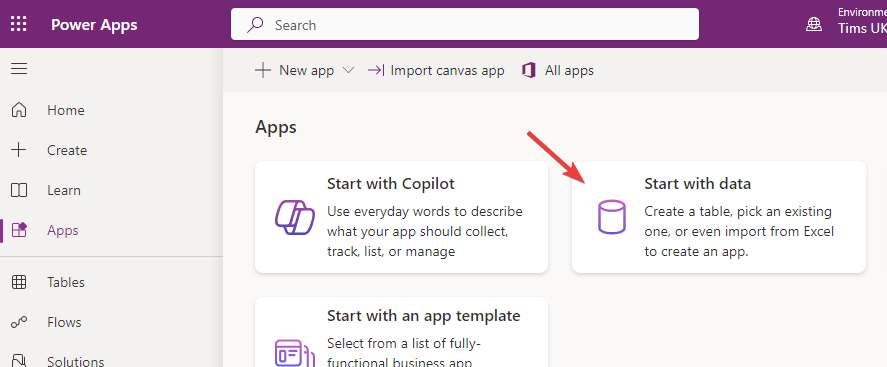
To build an app that connects to our SharePoint list, we'll choose the option in the Apps section of the Maker Portal to 'Start with data'. This offers the quickest way to create a working app.
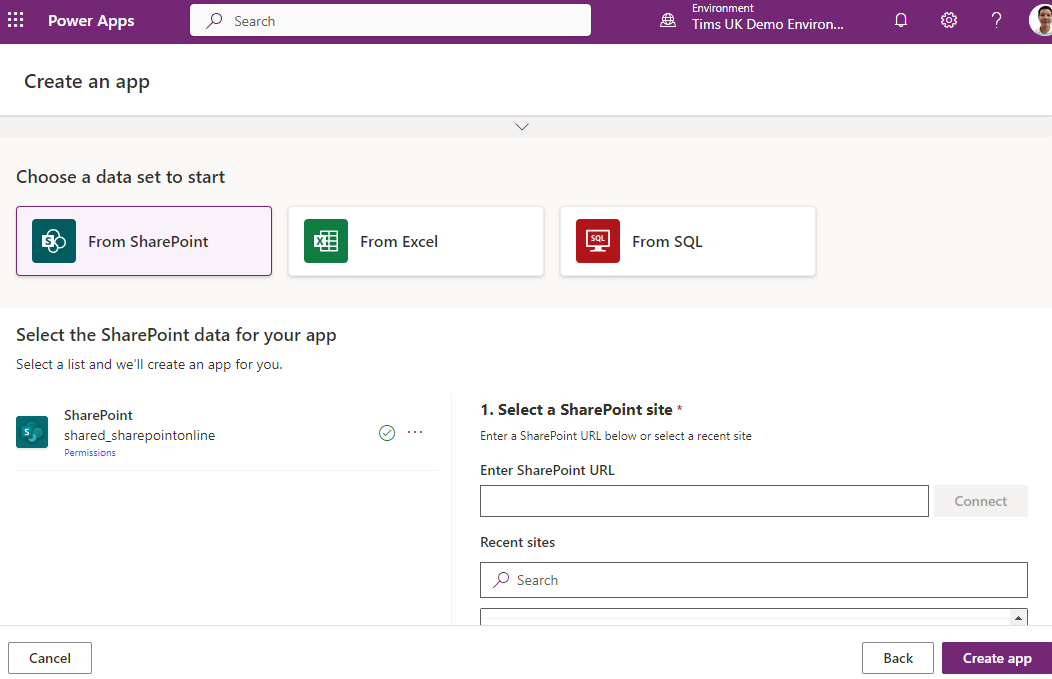
This option navigates to the screen beneath where we can select our SharePoint list and create a new app by clicking the 'Create app' button.
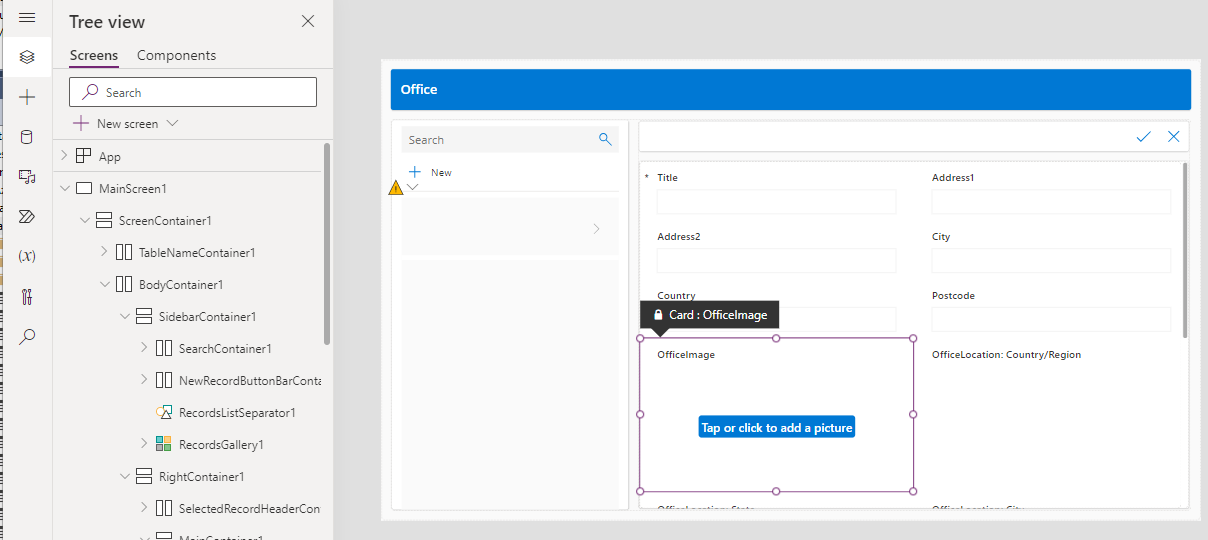
This creates the app that's shown in the screenshot below. On the main screen, we see a card with an 'add picture' control. This control enables a user to attach an image to a record.
Running the App - Uploading images to SharePoint
To test that this has worked correctly, we can now run the app and use the controls to create a record and add an image, as shown in the screenshot beneath.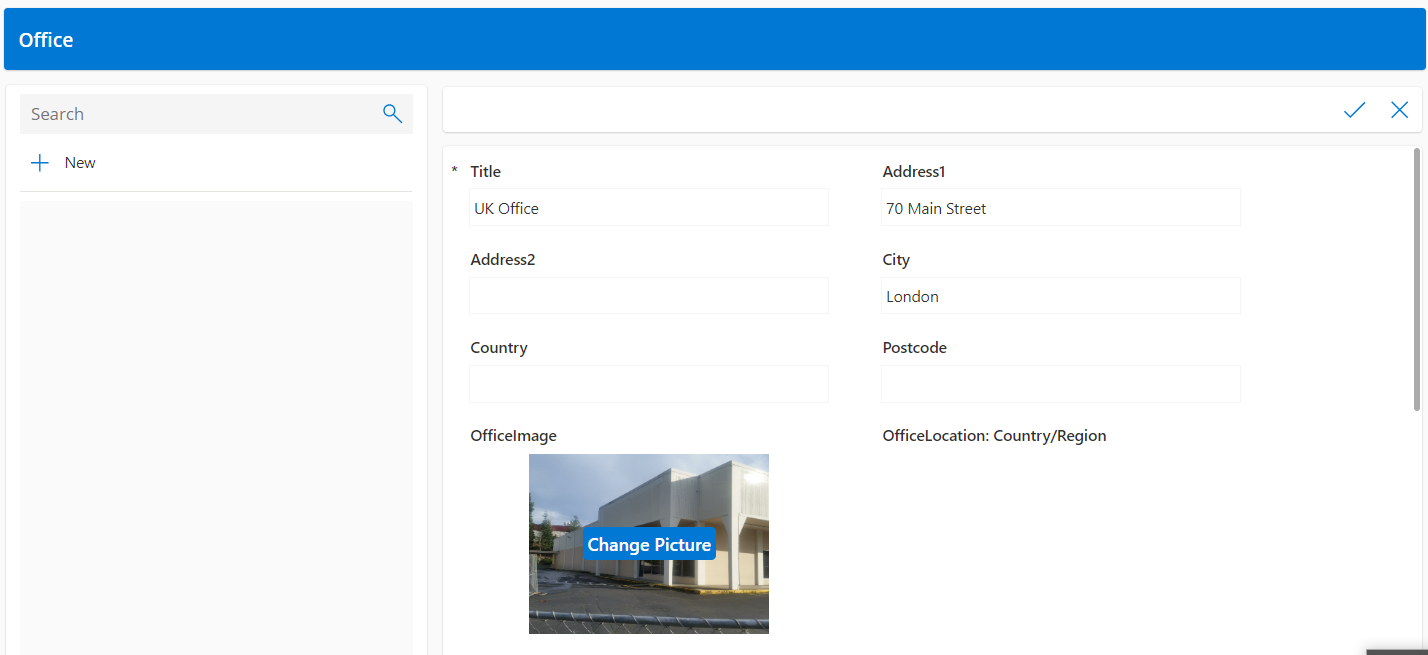
How to display thumbnail images of SharePoint images
One of the biggest benefits of using a SharePoint image column is that we can easily display thumbnails of the image content. In our example app, the gallery control contains an image control. The Image property of this control is set to ThisItem.OfficeImage.
If we amend the formula, notice how we can access the Full, Large, Medium, and Small image sizes. We use the syntax beneath to choose the required size.
ThisItem.OfficeImage.Full
ThisItem.OfficeImage.Large
ThisItem.OfficeImage.Medium
ThisItem.OfficeImage.Small
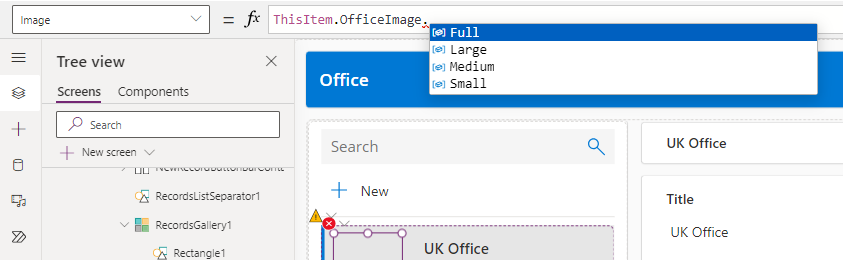
A good tip is that when displaying images in a gallery control, we can improve the performance of our app by displaying Small images. This reduces the amount of data that needs to be retrieved when loading multiple records.
How to display full images of SharePoint images
A frequent question that app builders report when using SharePoint image columns is that the image appears fuzzy, or that a low-resolution image appears. The solution to this is to reference the .Full property in the places where we want to display the full image.ThisItem.OfficeImage.Full
Adding images to a SharePoint Image column - how it works
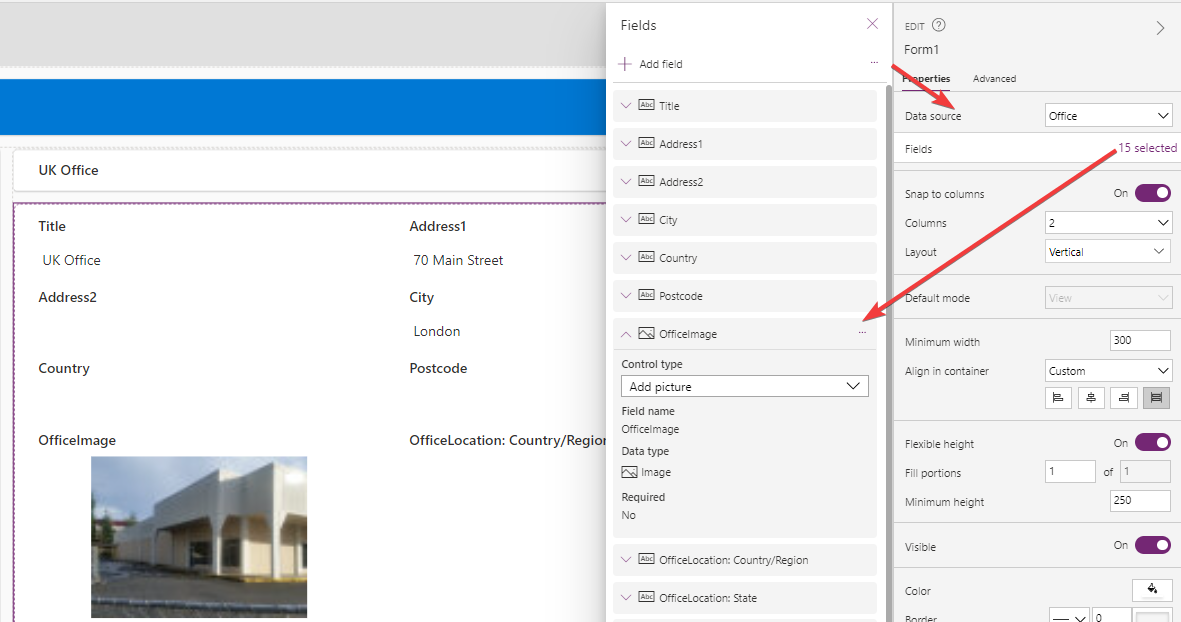
Let's look more closely at the autogenerated app to understand better how to add images to the SharePoint list.The app contains a Form control (called, Form1). The 2 settings that are required to save an image are as follows:
- The DataSource property must be set to the name of the SharePoint list.
- The Image column must be added via the Fields section
To initialise the form in 'New' mode, we add a button and call the following function:
NewForm(Form1)
To save the record, we add a Save button and call the SubmitForm function like so.
SubmitForm(Form1)
Updating an image from a SharePoint Image column - how it works
To edit an existing record, the form control must also include the following settings:
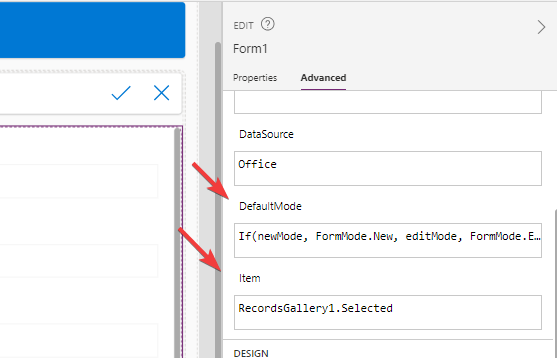
- The Item property must reference the record to update
- The DefaultMode property should be set to FormMode.Edit
With the autogenerated app, these properties are set as follows.
The Item property is set to the record that's selected in the gallery control (RecordsGallery1.Selected). When the user clicks the edit icon, the formula sets a variable called editMode to true.
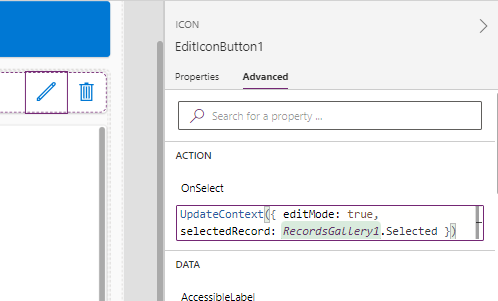
The DefaultMode property of the Form tests the value of editMode and if it's true, it sets the mode to FormMode.Edit.
As with adding a new record, we save the record by adding a Save button and calling the SubmitForm
SubmitForm(Form1)
Conclusion
With SharePoint, the easiest and preferred way to store images is to use an image column. This post walked through how to quickly build an app that stores images using the 'start with data' feature and provided some explanation as to how this auto-generated app works.
