Text - How to split input strings by carriage return followed by the colon character
When parsing text, it may be necessary to nest calls to split - that is, to split an input string by a character initially, and to split each sub-element by another character.
An example of such an operation might be the parsing of text where each row is separated by a carriage return, with the fields in each row separated by a comma.
An example of such an operation might be the parsing of text where each row is separated by a carriage return, with the fields in each row separated by a comma.
The typical user requirement here is to convert the input string into a collection so that we can display the result in a gallery.
The syntax to perform nested splits may not be obvious, therefore this post demonstrates an example of how to carry out this task.
The key syntax to nest calls to Split
The key syntax to nest calls to Split
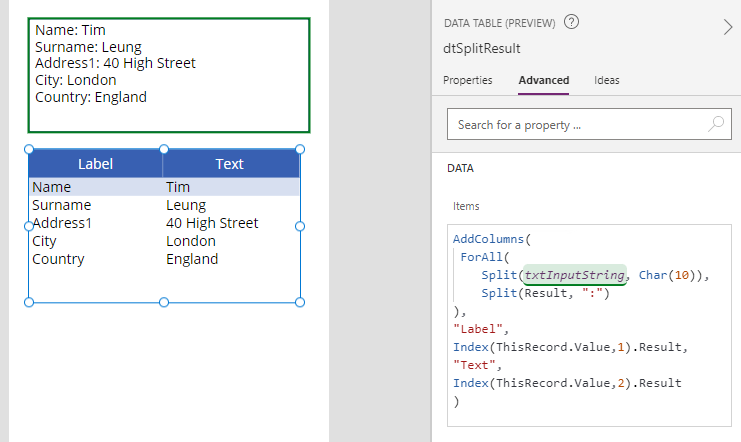
For this post, we'll take the following example input data:
Name: Tim
Surname: Leung
Address1: 40 High Street
City: London
Country: England
Assuming that the input is contained in a text input control called txtInputString, here's the core syntax for nesting 2 calls to Split.
ForAll(
    Split(txtInputString, Char(10)),
    Split(Result, ":")
)
This formula calls the ForAll() function to iterate over each element of
the array returned by the first Split() function. For each iteration, it further calls the Split() function to split each value by
the colon character.
To provide a visual representation of what this formula returns, here's what we see if we were to call ClearCollect to store the result in a collection.
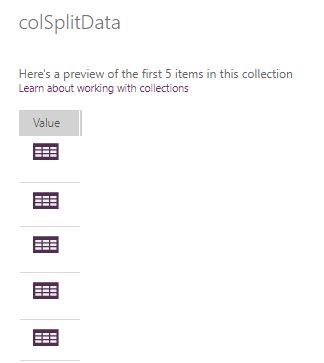
Each line appears as a row in this collection. If were to drill into a specific row, we see that there are 2 child rows. The first child row contains the content to the left of the colon character, whereas the second row contains the content to the right of the character.

How to display nested split output on a screen
The typical user requirement is to parse this input data and to store the result in a collection, or to display it on screen, perhaps through a gallery control.
Given the structure of the data that's shown above, we can surface the child rows by calling the AddColumns function as shown beneath.
AddColumns(
   ForAll(
      Split(txtInputString, Char(10)),
      Split(Result, ":")
   ),
   "Label",
   Index(ThisRecord.Value,1).Result,
   "Text",
   Index(ThisRecord.Value,2).Result
)
This formula calls the Index function to add rows 1 and 2 of the child table into 2 parent rows called "Label" and "Text".
The screenshot below illustrates the end result if were to set the Items property of a data table control to this formula.
Conclusion
It may not be obvious how to nest calls to the Split(). This post demonstrated a use-case scenario of how to parse an input string that's separated by both carriage return and colon characters.
