Model driven apps - how to display how much time remains until a milestone date
Model driven apps provide a timer control. This
control displays a countdown timer that shows the time that remains
until some milestone event. It can also show how much time has passed
following the event, and it can display different labels, or cancel/pause the timer depending on field
values.
The
process is slightly complex because we can only use the classic
designer to carry out this task. In this post, we'll walk through this
process.Example requirement
To
demonstrate, let's take
an issue table that stores issue records (or support tickets). Each issue
record stores a create date, an end date, and a 'target end date' value.
To
demonstrate how the timer control works, we'll add a timer control that
displays the remaining time until the record reaches the 'target end date' of an issue.
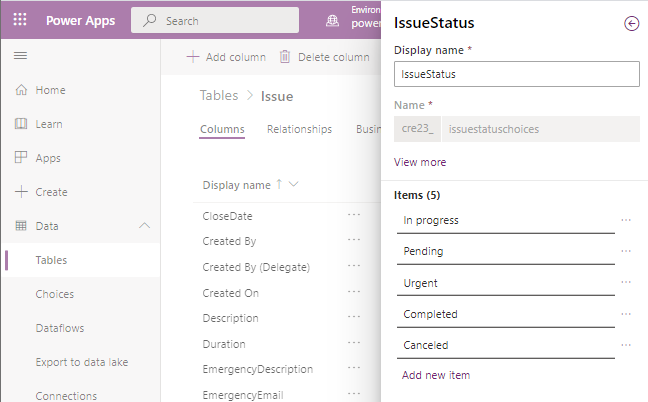
The issue status choice column is important, because this column helps control the display of the timer control. For example, if the status of an issue is canceled, we can hide the timer display.
Adding the timer
control to a form
From the classic designer, we can use the insert menu item to add a timer control.
The most important setting it is the 'failure time field'. The label for this is possibly confusing. The purpose of this field is to specify the column that contains the target date time value that we want to countdown to. Therefore, it could equally be described as the 'success time field'. For this example, we set this to the 'target end date' column.
Beneath the 'failure time field' are five additional settings. These allow us to configure the behaviour of the timer, based on the values of choice, or yes/no fields.
How the timer control looks at runtime
At
this stage, we can save and publish our form, and run our app. The
animated image beneath illustrates the behaviour of the timer control.
From this image, we can see the following default behaviour:
Example requirement
To
demonstrate, let's take
an issue table that stores issue records (or support tickets). Each issue
record stores a create date, an end date, and a 'target end date' value.
Against
each record, we also store an issue status that describes the
progression of a record from start to end. These statuses are defined as
a choice column in the table, and the five statuses that we've defined
include:
- 'in progress', pending, urgent, completed, and
canceled.
The issue status choice column is important, because this column helps control the display of the timer control. For example, if the status of an issue is canceled, we can hide the timer display.
Adding the timer
control to a form
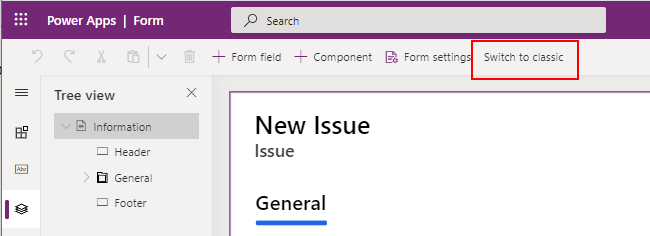
We begin
by creating or editing a form. The standard form designer in Power Apps
does not allow us to add the timer control. Therefore, we click the
'switch to
classic 'button to open the classic
designer.
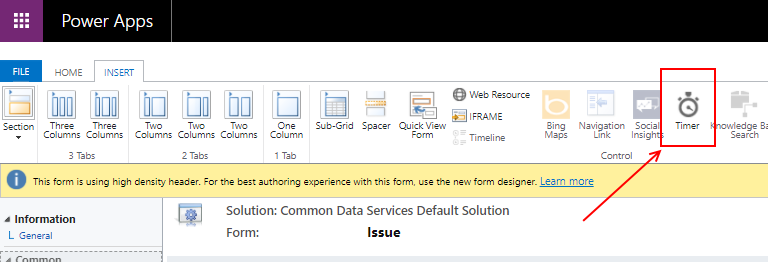
From the classic designer, we can use the insert menu item to add a timer control.
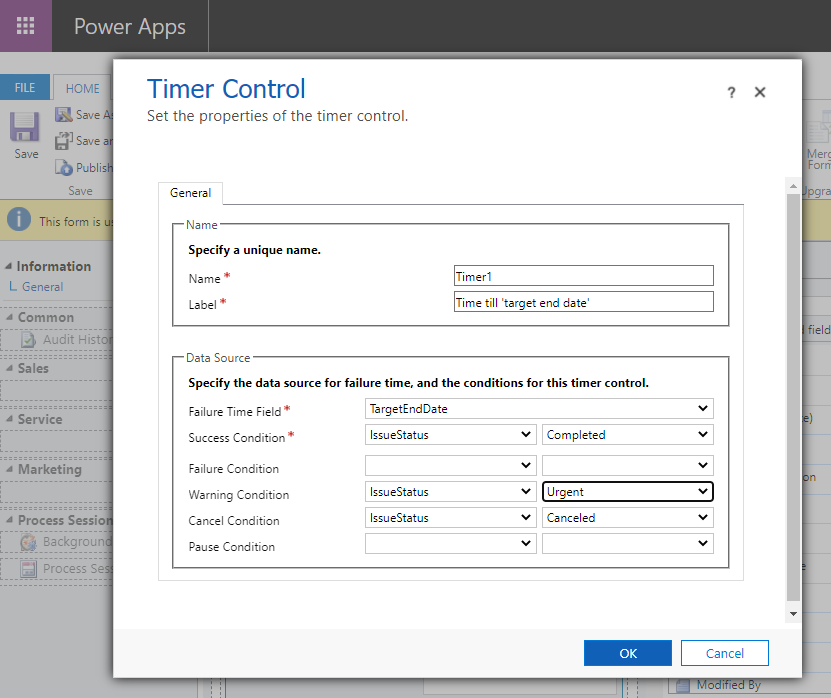
Next,
we click the 'change properties' button to open the screen that's
shown beneath. We can use this to configure the behaviour of the
timer.
The most important setting it is the 'failure time field'. The label for this is possibly confusing. The purpose of this field is to specify the column that contains the target date time value that we want to countdown to. Therefore, it could equally be described as the 'success time field'. For this example, we set this to the 'target end date' column.
Beneath the 'failure time field' are five additional settings. These allow us to configure the behaviour of the timer, based on the values of choice, or yes/no fields.
- Success
condition: We use this to indicate the success of the timer.
On success, the timer displays the label "succeeded". For this example,
we specify success when the issue status of the record is "completed".
- Warning
condition: We can specify a field value to indicate a warning
condition. Typically, we use this feature to highlight that
the success of the milestone is at risk. For this example, we specify a
warning when the issue status is 'urgent'.
- Cancel condition:
We can specify a field value to indicate when the timer should be
canceled. For this example, we cancel the timer if the issue status
is 'canceled'.
The
failure and pause conditions work in a similar way, and provide a way to
specify conditions to change the state of the
timer.
How the timer control looks at runtime
At
this stage, we can save and publish our form, and run our app. The
animated image beneath illustrates the behaviour of the timer control.
From this image, we can see the following default behaviour:- For a new record, we set the 'target end date' to tomorrow and set the status to 'in progress'. With these conditions, the timer control shows the remaining time in a black font.
- If we change the status to urgent, the warning label 'nearing expiry' appears.
- If we change the status to canceled, the countdown timer disappears and the timer control shows the description 'canceled'
- If we change the status to completed, the countdown timer disappears and the timer control shows the description 'succeeded'
- If we modify the record by setting an elapsed 'target end date' and resetting the status back to 'in progress', the timer control changes to red, and shows the time that has elapsed after the target end date.
Conclusion
With model driven apps, we can display a countdown timer that shows the time that remains
until some milestone event. This control can also show how much time has passed
following the event, and it can display different labels based on different conditions.
