Media - How to rotate images on screen
When we build apps where users can upload images to a data source, a typical requirement is to provide the ability to rotate the images that are displayed in an image control. This provides a better experience in cases where users upload upside-down pictures, or pictures that have been taken in an incorrect orientation
In this post, we'll walk through how to supplement an image control with two buttons - one that rotates the image 90° clockwise on each click, and another that rotates the image 90° anti-clockwise on each click.
Exploring the image control
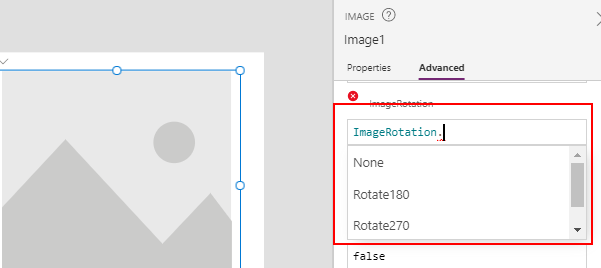
The key property that enables us to carry out this task is the ImageRotation property of the image control. This property accepts an ImageRotation enumeration value with four acceptable values - None, Rotate90, Rotate180, and Rotate270
The first step in this example is to add an image control to a screen.
Adding buttons to rotate the image
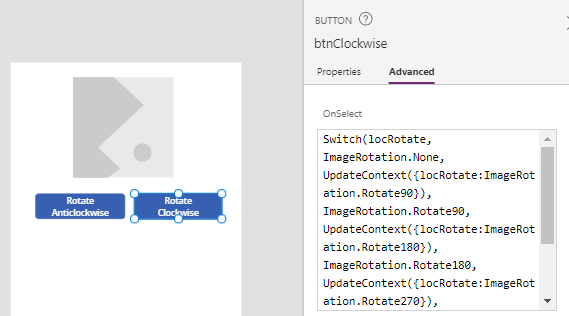
To build this feature, we'll define a local variable that stores thecurrent rotation value. The button to rotate the image anti clockwise will reduce the value of this variable value by 90°, and the button to rotate the image clockwise will increase the value by 90°.In the OnVisible property of the screen, we can initialise the variable to a rotation value of 'None'. Here's the formula that we would use.
UpdateContext({locRotate:ImageRotation.None})Switch(locRotate,
ImageRotation.None, UpdateContext({locRotate:ImageRotation.Rotate90}),
ImageRotation.Rotate90, UpdateContext({locRotate:ImageRotation.Rotate180}),
ImageRotation.Rotate180, UpdateContext({locRotate:ImageRotation.Rotate270}),
ImageRotation.Rotate270, UpdateContext({locRotate:ImageRotation.None}),
UpdateContext({locRotate:ImageRotation.None})
)
Switch(locRotate,
       ImageRotation.None, UpdateContext({locRotate:ImageRotation.Rotate270}),
       ImageRotation.Rotate90, UpdateContext({locRotate:ImageRotation.None}),
       ImageRotation.Rotate180, UpdateContext({locRotate:ImageRotation.Rotate90}),
       ImageRotation.Rotate270, UpdateContext({locRotate:ImageRotation.Rotate180}),
       UpdateContext({locRotate:ImageRotation.None})
)
The final step is to the set the ImageRotation property of the Image control to the variable:
locRotate
