Media - How to enable users to create and save screen shots from a canvas app
The ability to take screenshots from a canvas app can be very useful, particularly in cases where users want to produce simple reports.
Through a forum post, I recently discovered a PCF component by Ritika Agarwal to carry out this task. This component works very well and you can download it from the following GitHub site.
Once this completes, we can add the screenshot component to an app.
How to email a screenshot to a user
To email the screenshot to a user, we can call the SendEmailV2 method of the Office365 connector. There are more details on how to use this connector here.
How to save the screenshot to a data source
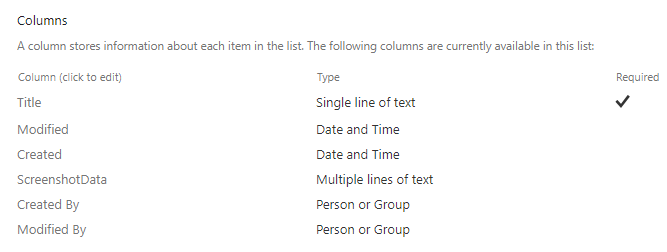
To demonstrate how to save the screenshot to a data source, let's take the typical approach of saving the base 64 encoded content to a SharePoint multi-line text field. We'll use the SharePoint list shown below (called Screenshot).
Through a forum post, I recently discovered a PCF component by Ritika Agarwal to carry out this task. This component works very well and you can download it from the following GitHub site.
Technically, this control works by locating the HTML canvas that hosts a screen, and calling the toDataURL method.
https://developer.mozilla.org/en-US/docs/Web/API/HTMLCanvasElement/toDataURL
In this post, we'll walk through how to install and add this control to a canvas app.
How to install the screenshot component.
To install the screenshot component, the first step is to download the Screenshot_1_0_0_1_managed solution file from the GitHub site. The direct link is below:From the Power Apps maker portal, we can install the solution by navigating to the Solutions area and clicking the 'Import' button.

Once this completes, we can add the screenshot component to an app.
How to add the screenshot component to a Canvas app
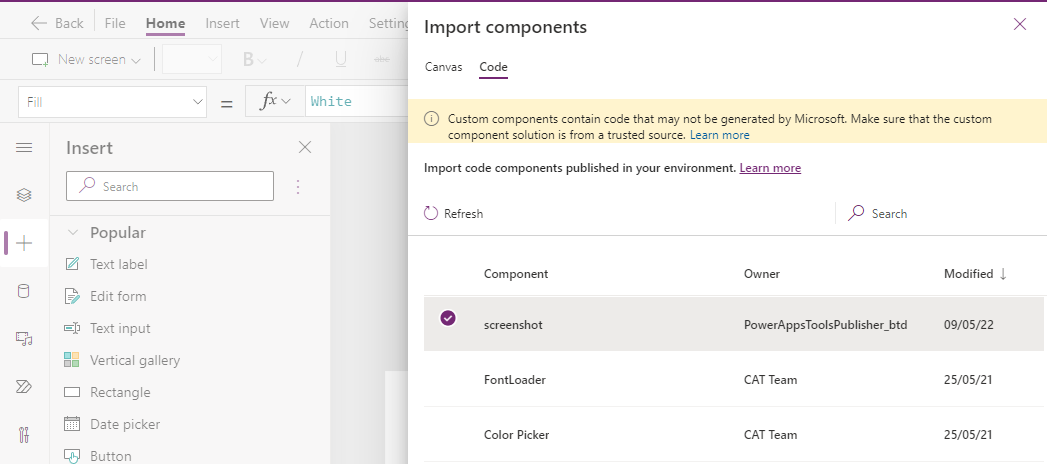
To add the screenshot component to an app, select the insert panel from the left-hand pane and click the ‘Get more components’ link (this appears at the bottom of the page). From the 'Import components' panel, select the 'Code' tab and import the screenshot component.How to configure the screenshot component
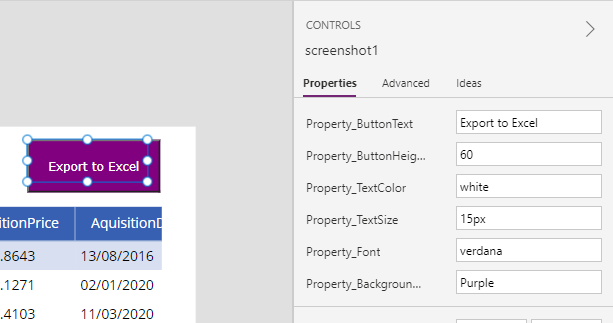
To use the component, we add it to the screen that we want to
screenshot. The image below shows the appearance of the component in the designer. It contains a button that triggers the creation of the screenshot. The default text label of this button is “Export to Excel”, and we can change it to something more appropriate by modifying the Property_ButtonText property (for example, "Save screenshot"). As highlighted in the image of the properties pane, it's possible to set other attributes of the screenshot button, including the font and colours.
Taking a screenshot with the screenshot component
When a user clicks the screenshot button, we retrieve the screenshot by referencing the OutPut property. This returns a base 64 encoded representation of the
screenshot.
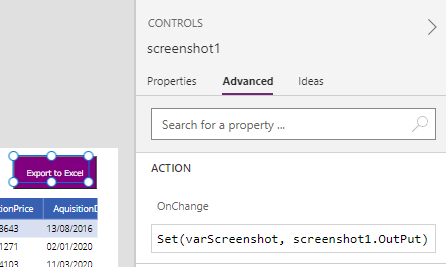
We can save the screenshot to a variable by adding the following formula to the OnChange property.
Set(varScreenshot, screenshot1.OutPut)
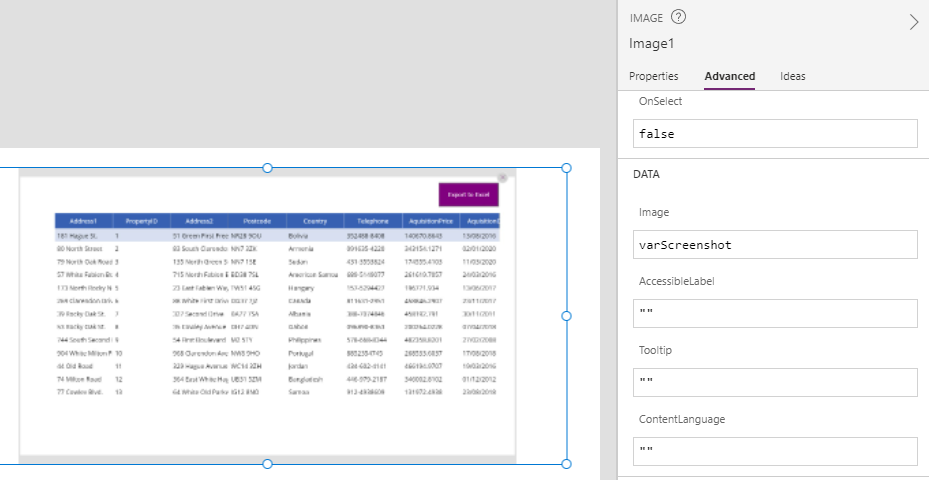
To view the screenshot that's been taken, we can add an image control and set the Image property to varScreenshot.
How to email a screenshot to a user
To email the screenshot to a user, we can call the SendEmailV2 method of the Office365 connector. There are more details on how to use this connector here. From the OnChange property of the screenshot component, we can use the syntax below to send an email message and to include the screenshot as an email attachment.
Office365Outlook.SendEmailV2(
    "[email protected]",
    "Email Subject",
    "Email Body",
    {
        Attachments: Table(
            {
              Name: "Screenshot.jpg",
              ContentBytes:screenshot1.OutPut
            }
         )
        ,
        Importance: "Normal"
    }
)
How to save the screenshot to a data source
To demonstrate how to save the screenshot to a data source, let's take the typical approach of saving the base 64 encoded content to a SharePoint multi-line text field. We'll use the SharePoint list shown below (called Screenshot).The formula to patch the screenshot to a new record in the SharePoint list looks like this:
Patch(Screenshots,
      Defaults(Screenshots),
      {
         Title:"ScreenshotTitle",
         ScreenshotData:screenshot1.OutPut
       }
)
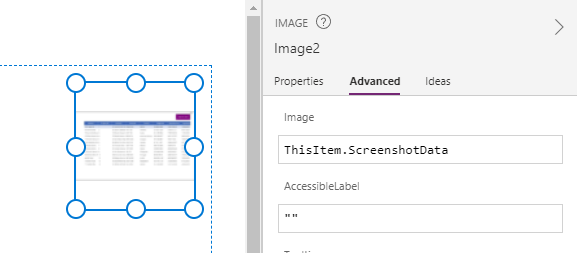
To display the record and screenshot in an app, we can add a gallery control with the Items property set to the SharePoint list. We can then add an image control to the gallery template, and set the image property to ThisItem.ScreenshotData.
