Blog
Model driven app - How to calculate working days
March 16. 2021
A common business requirement is to make date calculations based on working days.
To demonstrate this requirement, we'll take the example of a model driven app that records issues (or support tickets). Each issue record stores a create date, an end date, and a 'target end date' value.
The requirement is to set the 'target end date' to 7 days after the create date when a user creates a record.
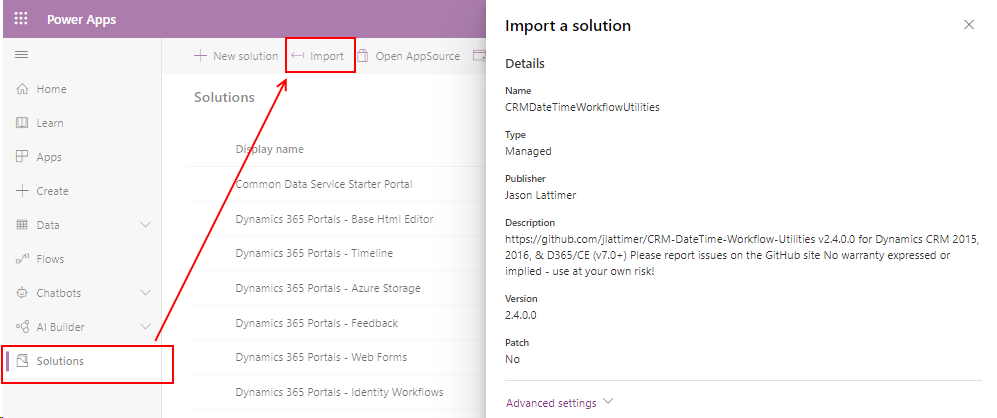
From the Power Apps Maker Portal, we import this solution through the Solutions > Import menu item.


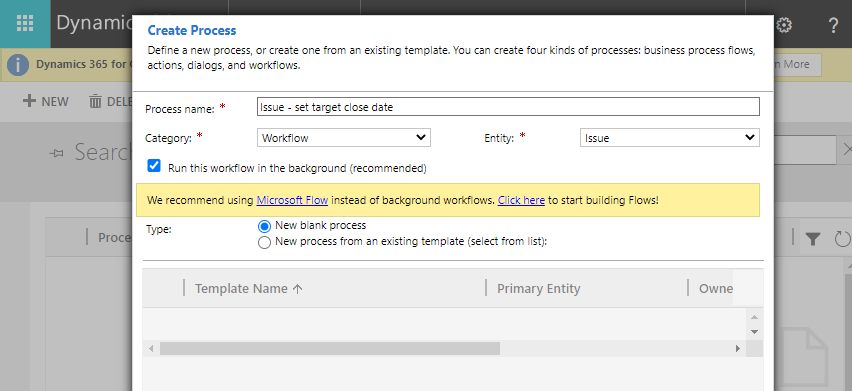
From here, we choose the option to create a new process. In the create process dialog, we select 'workflow' from the category drop-down, and we can specify our target entity.
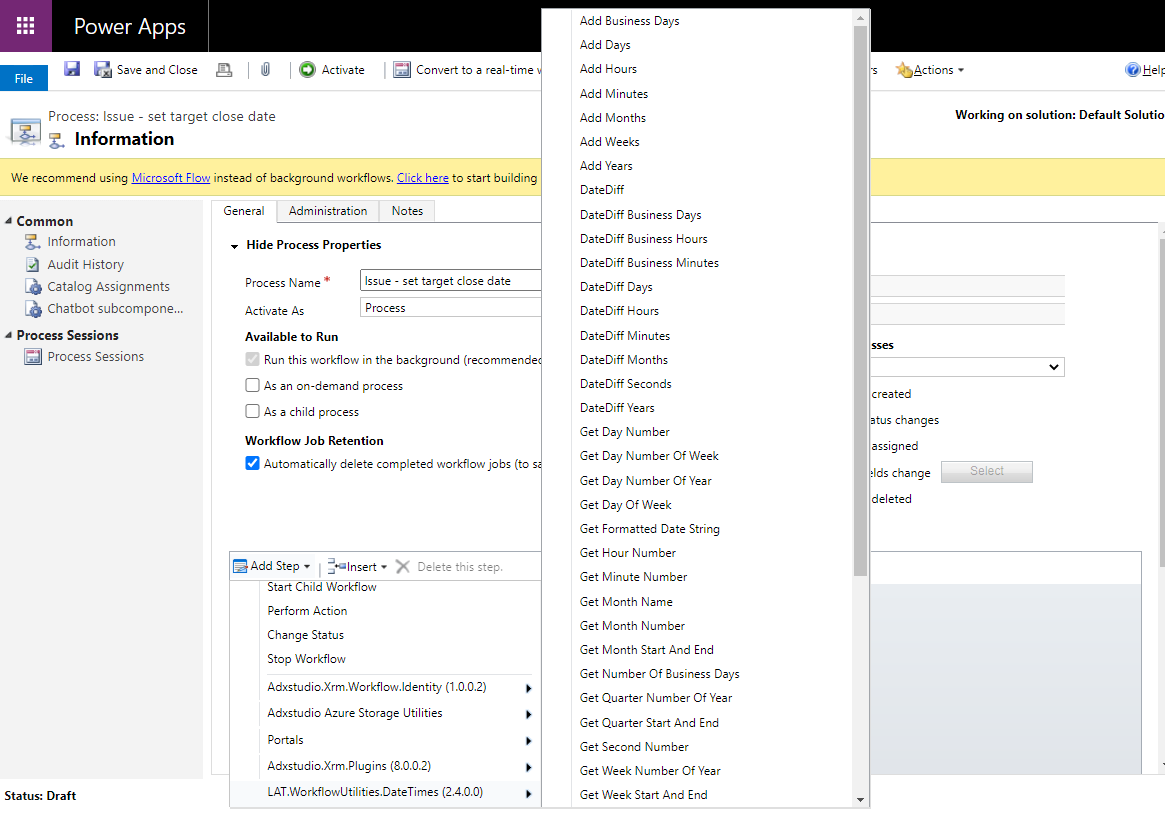
In the process designer, we can add a step. As the screenshot beneath shows, we can select the LAT.WorkflowUtilities.DateTimes(2.4.0.0) menu item to access all the available date/time functions.
We can select the 'Add Business Days' menu item to open the screen beneath. This illustrates how to add 5 business days to the 'created on' field.

To demonstrate this requirement, we'll take the example of a model driven app that records issues (or support tickets). Each issue record stores a create date, an end date, and a 'target end date' value.
The requirement is to set the 'target end date' to 7 days after the create date when a user creates a record.
What's the main challenge?
The most immediate problem is that 'business rules' (the preferred way to carry out these tasks), provides very little support for date calculations.
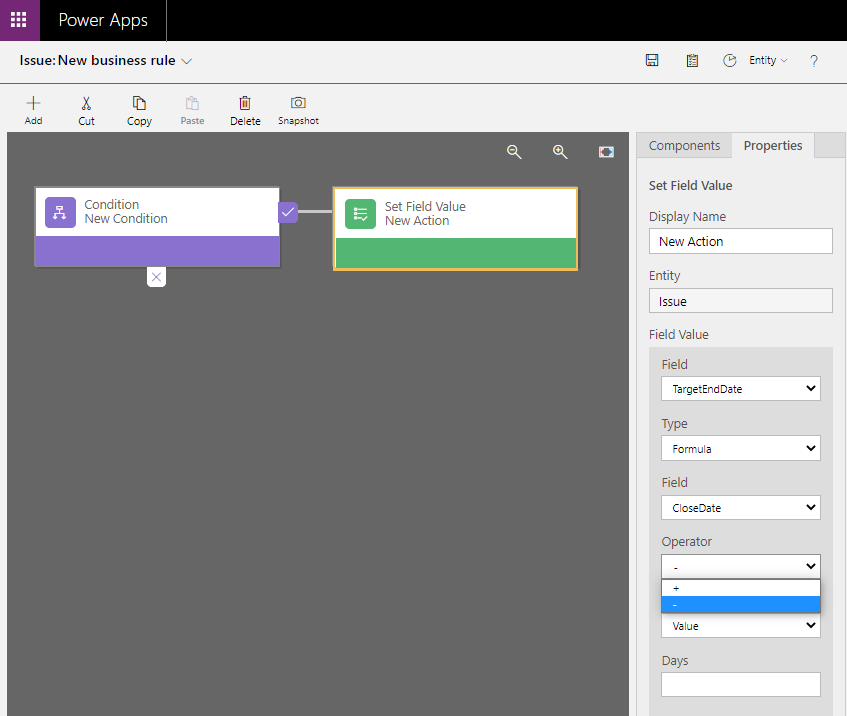
As the screenshot beneath shows, the date operators are limited to the + and - operators. For more complex calculations, a crucial limitation is that there's no built-in way to set the current date and time as an input for a date calculation.
As the screenshot beneath shows, the date operators are limited to the + and - operators. For more complex calculations, a crucial limitation is that there's no built-in way to set the current date and time as an input for a date calculation.

Due to these business rules limitations, a reliable way to perform these types of calculation is to use a workflow, and a simple method is to use Jason Lattimer's "CRM DateTime Workflow Utilities".
This open source library offers a wide range of date functions, including functions to add, retrieve, and to calculate date differences in seconds, hours, minutes, days, months, and years. There's also the ability to add business days, round times by quarter, half, and whole hours, and many more functions.
Why use workflows?
Microsoft discourage the use of workflows and recommend that we use Power Automate instead. Therefore, an important question is - why use a workflow in this scenario?A key factor is that with Power Automate, there's no simple way to calculate working days. A common method is to loop through all available days and on each iteration, to increment a variable if the day is a work day. Another technique is to build a Flow that automates the calculation of the value in Excel, by calling the Excel Workday function.
https://powerusers.microsoft.com/t5/Building-Flows/Calculating-Business-days-using-flows/td-p/315402
Whilst workflows are still supported, they still offer one of the cleanest and most effective ways to carry out this task.
How to install the "CRM DateTime Workflow Utilities"
The first step is to download the utilities from the Github site.
The name of the solution file is CRMDateTimeWorkflowUtilities_2_4_0_0_managed.zip.

Building a workflow
To build a workflow, we use the processes section of the Dynamics 365 settings. From the Power Platform admin centre, we open the settings for our target environment. Under the resources group, we select 'All legacy settings'. Beneath Settings > 'Process Center', we click the processes menu item.


We would complete our process by adding another step to update the 'target end date' field of the record. Finally, we would save and activate the process.
Testing the process
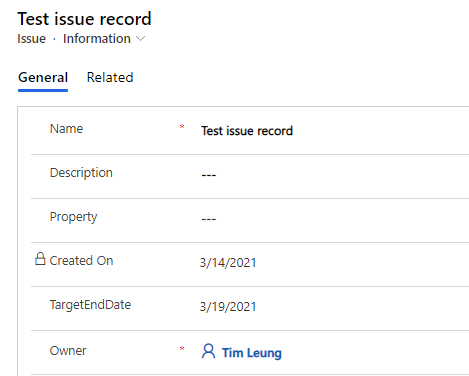
To test the process, we can add a new record through our model driven app. As the screenshot beneath illustrates, when we save and re-open the record, the process successfully sets the target end date to 5 business days after the create date.
Conclusion
With model driven apps, an effective way to calculate working days is to use a workflow. In this post, we walked through how to perform this task with the help of "CRM DateTime Workflow Utilities".- Categories:
- model driven app
- date time
Related posts
