Navigation - How to build dynamic data driven navigation, or to restrict access to screens based on data
From Power Apps, it's relatively simple to write formula that navigates the user to a different screen. We call the Navigate function.
The crux of the problem is that the Navigate function takes a screen object as an input, and it isn't possible to pass the screen name in text to the Navigate function. This makes it challenging to build dynamic menu and navigation structures. Examples of such use case scenarios may include:
- Building access control features where we define the screens that each user can access in a SharePoint list (or other data source).
- Building 'dynamic navigation' where an app navigates different users to different screens, depending on data.
To fulfil these types of requirement, the general strategy is to store the screen references, names and identifiers in a variable, and to use this structure to lookup the screens that we want to access.
Demonstration - How to show a list of screens in a gallery control
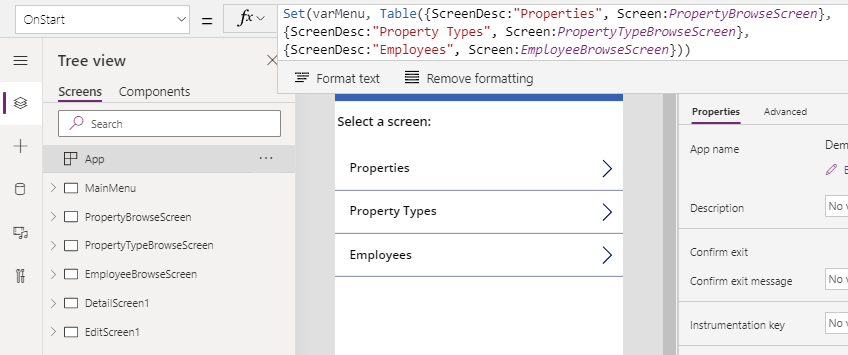
To start with a simple example, here's how to display a list of screens in a gallery control.
In the OnStart property of the app, we set a variable that stores the screens along with an identifier.
Set(varMenu,
   Table({Id:1, Desc:"Properties", Screen:PropertyBrowseScreen},
         {Id:2, Desc:"Property Types", Screen:PropertyTypeBrowseScreen},
         {Id:3, Desc:"Employees", Screen:EmployeeBrowseScreen}
   )
)
This formula calls the Table function to create a table with 3 records. Each record includes 3 fields - a numeric ID field to uniquely indentify the screen, a description, and a field that stores the screen object.
We can then add a gallery control and set the Items property to varMenu. To display the screen name, we can set a label to ThisItem.Desc. To configure the gallery to navigate the user to the associated screen, we can set the OnSelect property to the following formula.
Navigate(ThisItem.Screen)
How to restrict access to screens depending on the logged on user
Extending the example above, we can now add a feature to restrict access to screens based on the email address of the logged on user.
In the OnStart property of our app, we can add the following formula to add a collection that defines the email addresses of the user that are permitted to access the screens in the app. In practice, we could store this in a SharePoint list or other data source.
ClearCollect(colAccess,
             {screenId:1, email:"[email protected]"},
             {screenId:2, email:"[email protected]"},
             {screenId:3, email:"[email protected]"},
             {screenId:1, email:"[email protected]"},
             {screenId:2, email:"[email protected]"}
)
We can now modify the Items property of the gallery control to filter the list to include only those records where there is record in the colAccess collection with a matching screen id and email address.
The formula would look like this:
AddColumns(
          Filter(colAccess, email=User().Email),
          "Desc",
          LookUp(varMenu, Id=screenId).Desc,
          "Screen",
          LookUp(varMenu, Id=screenId).Screen
)
At runtime, the gallery will now only show screens that have been granted to the current user.
Conclusion
Where there's a requirment to build dynamic, data driven menu structures, a strategy to build this functionality is to store
the screen references and names/identifiers in a variable. We can then use
this structure to support our required functionality, including the ability to display the screen names in gallery control and to navigate the user the assoicated screen.
